In today’s tutorial, we’re going to learn how to use sidechain compression in Logic Pro X.
Just in case you’re still wondering though…
Sidechain compression (often simply referred to as “sidechaining”) is the result of triggering a compressor with [channel X] and applying that compression to [channel Y, Z, etc…]. The resulting sound is described as “pumping”.
Traditionally, the instrument used to trigger the compressor has always been the kick drum.
The resulting compression is then applied to other instruments; usually the bass and/or pad(s).
If it’s still confusing to you, don’t worry! The rest of this tutorial is dedicated to showing you how to achieve sidechain compression in Logic Pro X and to providing you with a few musical examples.
- Step 1 – Setting up your session in Logic Pro X
- Step 2(a) – Triggering the compressor with an auxiliary bus
- Step 2(b) – Triggering the compressor with [channel X]
- Step 3 – Routing the sidechain compression to [channel Y, Z, etc…]
- Step 4 – Tweaking the parameters on your compressor
- Some examples of sidechain compression
- Summary: How To Use Sidechain Compression in Logic Pro X
Step 1 – Setting up your session in Logic Pro X
Okay, so the first thing we’re going to do is create 2 software instrument tracks.
For the sake of this tutorial, we’re going to limit ourselves to using stock plug-ins. So, let’s start by loading [drum machine designer] on track 1 and [Alchemy] on track 2.
Once that’s done, you’ll want to…
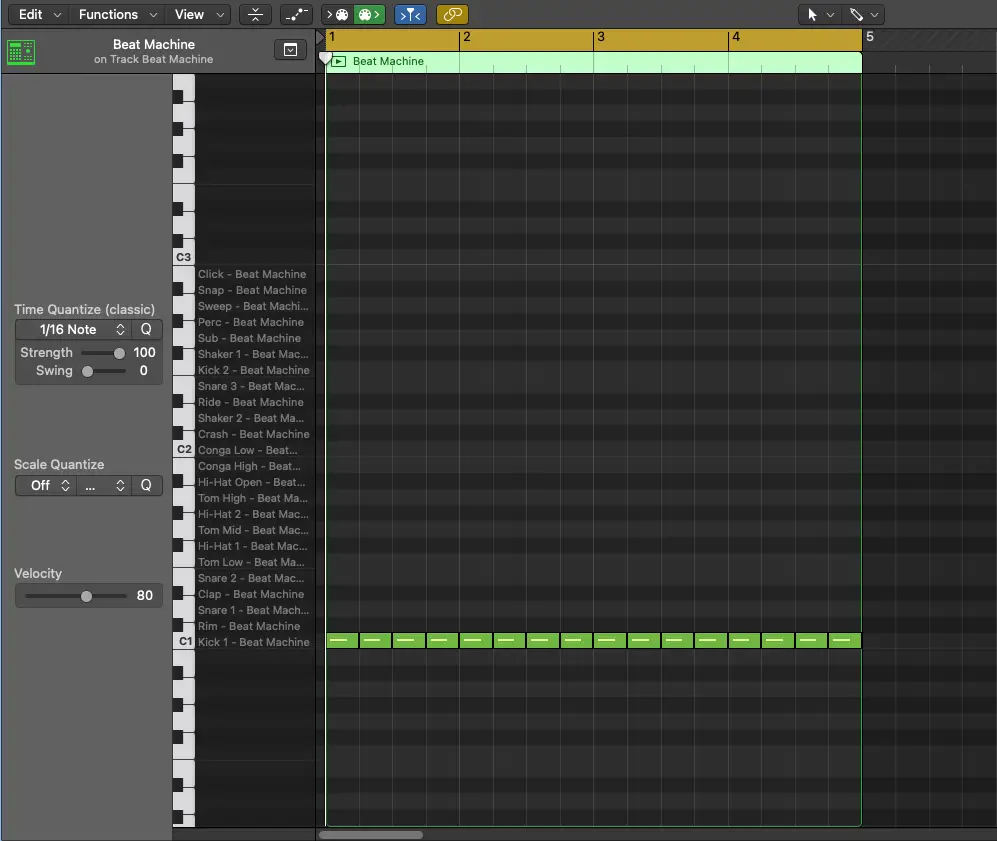
- Sequence a kick drum on every beat
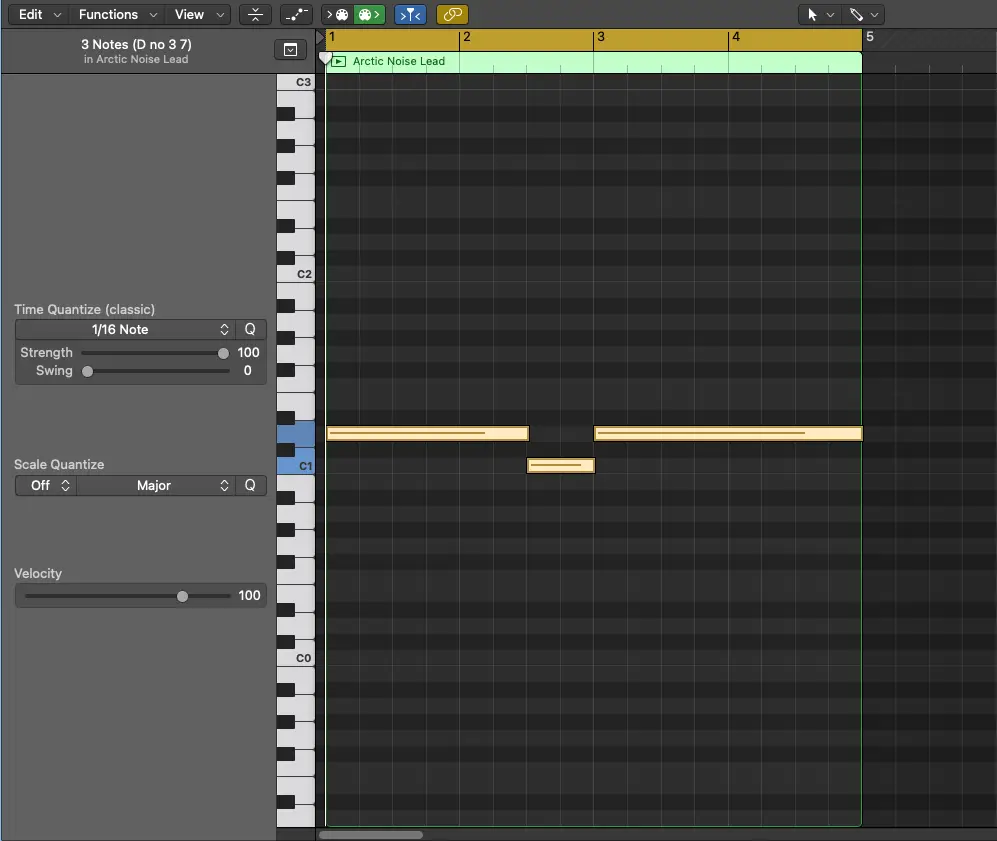
- Sequence a bassline/chord progression with long durations
It doesn’t need to be the most interesting example, we’re just focusing on the sidechain compression.
Once you’ve got the hang of things, you can move on to more interesting things.
Great, let’s continue on to the next steps!
Step 2(a) – Triggering the compressor using an auxiliary bus
There are different ways of achieving the same result, so we’re starting with the auxiliary bus.
We’re going to create this bus by “sending” our kick drum signal to bus 32.
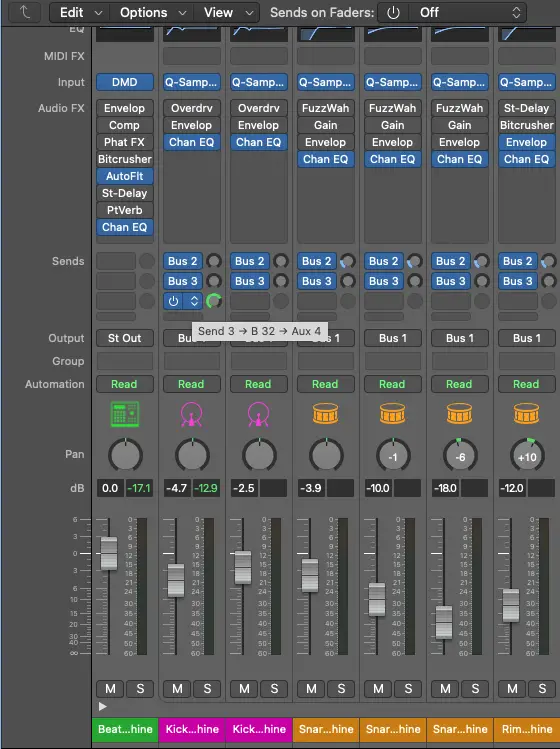
Let’s also make sure that the amount of signal sent is set to 0 dB (unity gain) and that the auxiliary bus is routed to “no output” instead of “stereo output”.
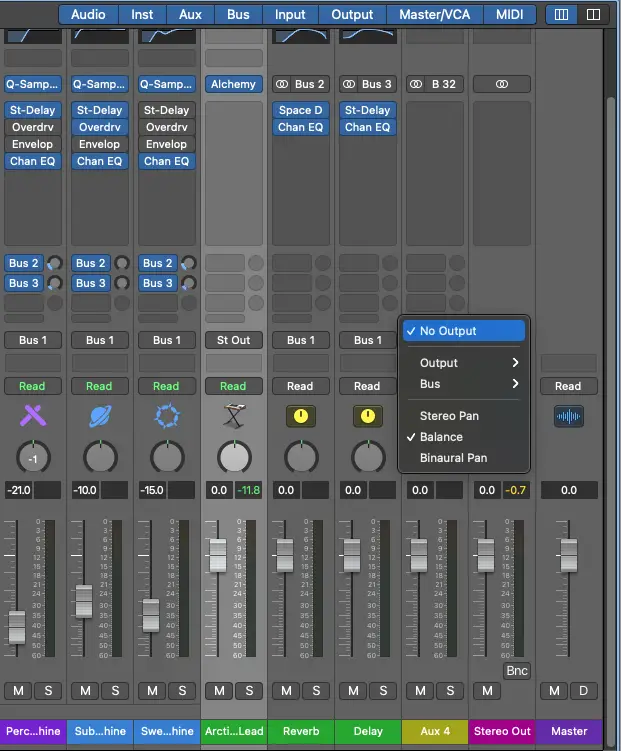
That way, the signal will be “trapped” inside the bus.
Next up, we’ve got the another alternative to using sidechain compression in Logic Pro X.
Step 2(b) -Triggering the compressor with [channel X]
The other way to trigger your compressor is to use an output directly from your software instrument.
In this example, the kick drum has its own dedicated channel already, but this won’t always be the case. If your setup is the same, then you’ll be able to save time with this method.
If it isn’t, you can usually route different drums to different outputs using your software instrument
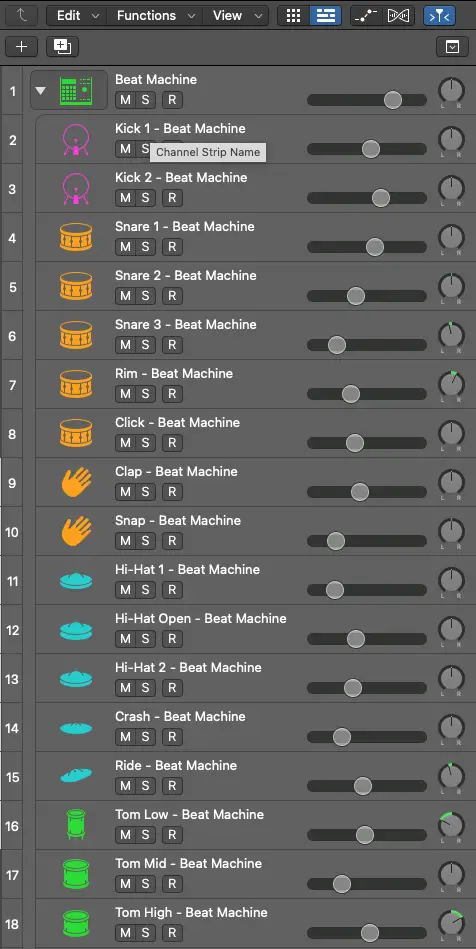
Step 3 – Routing the sidechain compression to [channel X, Y, etc…]
Regardless of the step you decided to go with (step 2(a) or step 2(b)), you’ll be using the same method to route the resulting sidechain compression to your instrument track.
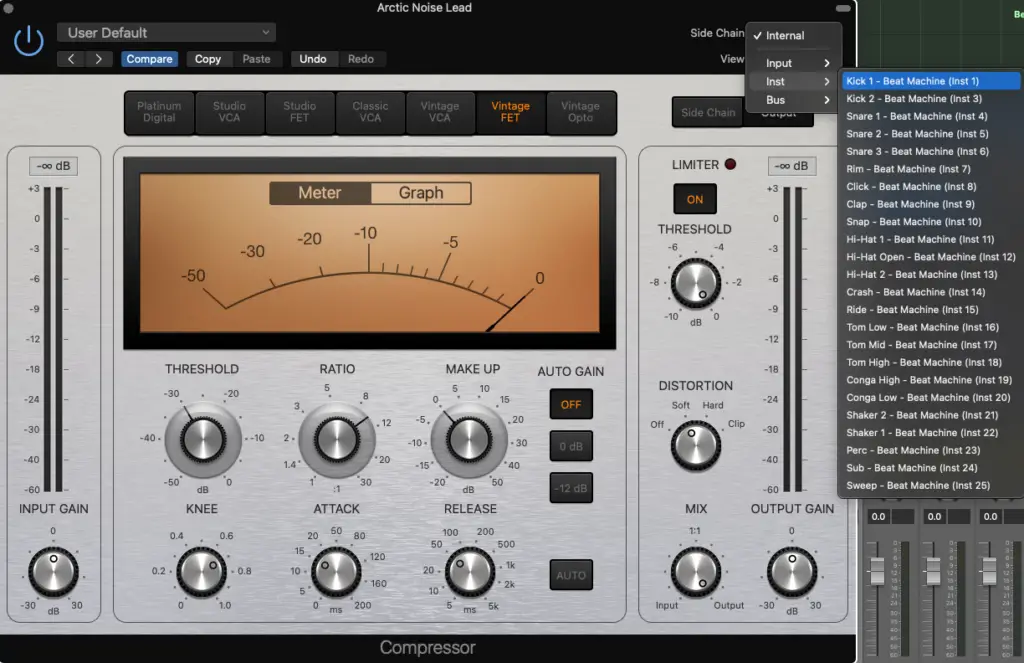
If you hadn’t already noticed, Logic Pro X’s stock compressor has a “sidechain” dropdown menu (top-right corner).

You’ll need to select Bus > Bus 32 <- Kick 1 – Beat Machine if you went with Step 2(a)…
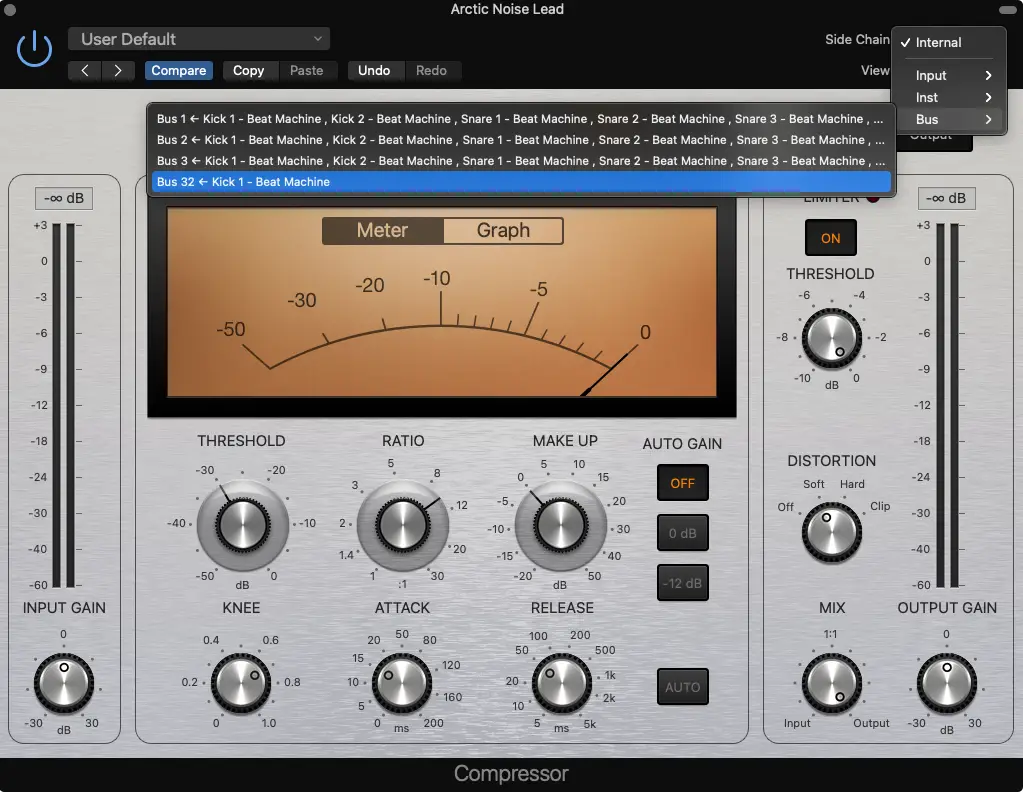
You’ll need to select Inst > Kick 1 – Beat Machine (Inst 1) if you went with Step 2(b)…

If you don’t know where to start, you can just copy the settings you see in both those screeshots.
What’s important is that your “Threshold” is set around -30dB and that your “Ratio” is set around 10:1.
We’ll be discussing the different parameters and how they affect the overall sound/feel in the next section. Before moving on, let’s just test everything out and make sure that your other instrument is “pumping”.
Step 4 – Tweaking the parameters on your compressor
Alright, so we’ve successfully learned how to use sidechain compression in Logic Pro X…
The last thing we need to do is learn how to control it.
The threshold and ratio parameters have an impact on the amount of “pumping” you’ll create, but it’s the attack and release parameters that impact the “shape” of your envelope.
I usually set my “Attack” between 0ms – 20ms and the “Release” around 200ms, BUT…
There isn’t any right or wrong way to go about doing it.
You’ll simply need to experiment and adjust the settings depending on the type of instrument you’re using to sidechain and the instrument(s) you’re sidechaining to.
You can even create multiple “sidechain compressors” to have maximum control.
The type of compressor (optical, VCA, etc…) will also have an impact on the responsiveness.
Some examples of sidechain compression
To give you a better idea of what’s possible, I’ve created some examples of sidechain compression using the same method we covered today.
I’m using the stock Logic Pro X compressor, but some of the instruments used are 3rd party…
Summary: How To Use Sidechain Compression in Logic Pro X
Did you know that sidechain COMPRESSION is only one of types of sidechaining?
That’s right! It’s definitely the most common, but you can also sidechain other effects.
You’ll start noticing that some of the other plug-ins in Logic Pro X also have this “sidechain” dropdown menu. So, you can feel free to start applying the same method and experimenting with them.
I’m also planning to make more sidechain tutorials, so I’ll be updtaing this article once I do.
For now, I hope that you enjoyed learning how to use sidechain compression in Logic Pro X and that it’s opened up a world of possibilities for you.
I’m always here to answer questions, so feel free to leave them down in the comments!
If you have any requests for future tutorials, leave them there as well!


