


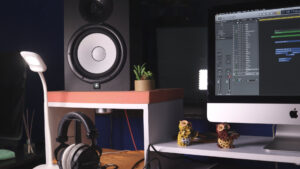
Are you an aspiring music producer, driven by a deep passion for crafting sounds and melodies that resonate with the world?
You may have heard of Logic Pro, the industry-standard digital audio workstation (DAW) trusted by professionals across the globe. If you’ve ever wondered how to harness the power of your Mac, then you’ll appreciate this beginner’s guide on how to use Logic Pro X.
In this comprehensive guide, we’ll take you on a journey through the intricate world of Logic Pro. We’ll demystify its features and capabilities, providing you with the knowledge and tools to create the music you’ve only ever dreamed of.
As we explore Logic Pro’s depths, you’ll gain the skills to compose melodies that stir emotions, craft intricate beats that make heads nod, and master the art of mixing and mastering to make prepare your tracks for release.
And here’s the exciting part – the journey you’re embarking on today has the potential to transform your passion for music into something more. While we’ll primarily focus on providing you with the knowledge you need to get started with Logic Pro, we’ll also tantalize your curiosity about what could lie ahead. In addition to this guide, we offer an online course designed especially for beginners, aimed at accelerating your learning curve and opening doors to a career in music production.
So, if you’re ready to dive into the world of Logic Pro, nurture your musical talents, and take the first step towards a journey filled with possibilities, you’ll definitely want to start taking notes!
Table of Contents
Logic Pro X: The DAW of Choice for Industry Professionals
As you embark on your music production journey, the choices you make can significantly impact your path to success. By choosing Logic Pro X as your preferred digital audio workstation (DAW), you’re already making a wise decision. Logic Pro X is the tool of choice for professionals, renowned for its exceptional sound quality, versatility, and efficiency.
But your journey doesn’t end there. Decibel Peak, your trusted educational resource, complements your choice by offering a range of tutorials, spanning from beginner to advanced levels, to guide you through the intricacies of Logic Pro X.
Let’s explore why Logic Pro X is the go-to DAW for professionals and why Decibel Peak is the perfect partner for your learning journey…
1. Unparalleled Sound Quality: Logic Pro X is renowned for its pristine audio quality. Professionals in the music industry trust it to deliver exceptional sonic fidelity, ensuring that their music sounds its best.
2. Versatile and Feature-Rich: Logic Pro X boasts a wealth of features and tools for every aspect of music production. From advanced MIDI editing to powerful audio processing, Logic Pro X caters to the diverse needs of professionals.
3. Extensive Sound Library: It offers a vast library of virtual instruments, samples, and effects, providing a wide palette of sounds for every genre and style. Professionals can find the right sound without needing to look elsewhere.
4. Efficiency and Workflow: Logic Pro X’s intuitive interface and efficient workflow streamline the music creation process. This means professionals can focus on their artistry and not get bogged down by technical hurdles.
5. Film Scoring Powerhouse: Logic Pro X is not just for music production; it’s also a formidable tool for film scoring. Its scoring capabilities, orchestral instruments, and synchronization features make it a staple in the film industry.
6. Regular Updates: Apple’s commitment to ongoing development ensures that Logic Pro X remains current with the latest industry trends and technologies. This forward-thinking approach keeps professionals at the forefront of music production.
Navigating the Main View in Logic Pro X

The main view in Logic Pro X is the epicenter of your music production journey. It offers a comprehensive workspace where you can compose, arrange, record, edit, mix, and master your music. To make the most of this versatile digital audio workstation (DAW), let’s explore the primary elements of the user interface (UI) and understand their respective functions.
By understanding and utilizing these main view elements in Logic Pro X, you’ll have a solid foundation for your music production endeavors. Whether you’re composing, recording, mixing, or mastering, this workspace provides a comprehensive set of tools and features to bring your musical ideas to life.
1. Workspace
The workspace encompasses the central area of the main view and is where the majority of your creative work occurs. This region houses your tracks, regions, and musical notation. Here, you’ll compose, edit, and arrange your music.
2. Inspector [i]
The Inspector resides on the left-hand side of the main view and provides detailed information and controls for the selected track or region. You can access track parameters, MIDI data, audio effects, and automation here, making it an essential tool for fine-tuning your projects.
3. Library
The Library is a repository of musical content and presets, such as virtual instruments, patches, samples, and drum kits. It’s located on the left-hand side of the main view, just below the Inspector. The Library is a valuable resource for quickly accessing sounds and settings to enhance your creative process.
4. Smart Controls
Smart Controls are situated on the right-hand side of the main view and provide a user-friendly way to adjust instrument and effect parameters. You can use these controls to shape the sound of your virtual instruments and effects easily.
5. Mixer [x]

The Mixer, located at the bottom of the main view, is your control center for mixing and audio processing. It displays all your tracks and allows you to adjust faders, pan controls, and apply effects to shape the final sound of your project.
6. Transport Bar

The Transport Bar appears at the top of the main view and serves as your control panel for playback, recording, and navigation. It contains buttons for play, stop, record, and more, ensuring smooth project management and control.
7. Main Menu
The Main Menu is found at the top of the main view, offering access to essential functions like project management, preferences, and various editing options. You can also access key features, such as track creation and automation, from this menu.
8. Toolbar
The Toolbar, typically located at the top of the main view, provides quick access to essential tools and functions. You can customize it to include the tools you use most frequently, making it a highly personalized workspace.
9. Tracks Area
The Tracks Area is the central part of the workspace, where you’ll find your tracks and their associated regions. It’s where you’ll do the bulk of your work, including recording, arranging, and editing your music.
Editing Tools in Logic Pro
The editing tools in Logic Pro X are your toolkit for precision and creativity.
Whether you’re working with audio recordings, MIDI sequences, or fine-tuning your mix, each tool serves a specific purpose, providing you with the flexibility to realize your creative vision and craft professional-quality productions.
Flex Time
- Purpose: Adjust the timing of audio recordings with precision.
- Examples: Correcting timing errors in a drum track, Creating rhythmic effects by manipulating the timing of individual audio events.
Flex Pitch
- Purpose: Correct pitch and shape the characteristics of vocal recordings.
- Examples: Correcting off-key notes in a vocal performance, Adding natural-sounding pitch variations for expressive vocals.
MIDI Editing
- Purpose: Compose and arrange MIDI sequences with precision.
- Examples: Creating melodies and harmonies in the Piano Roll Editor, Fine-tuning note pitches, durations, and velocities for expressive MIDI sequences.
Advanced Audio Editing Tools
- Purpose: Provide a range of advanced audio editing capabilities.
- Examples: Using the Sample Editor for detailed waveform editing, Correcting timing and pitch issues in audio recordings, Applying tempo maps and elastic audio editing with Flex Time.
Automation
- Purpose: Control and automate parameters to add movement and dynamics to your mix.
- Examples: Automating volume and panning for dynamic changes in a song, Creating intricate automation curves for expressive mix adjustments, Fine-tuning automation to achieve precision and coherence in dynamic elements.
Time Stretching and Compression
- Purpose: Manipulate the duration of audio regions for time-based effects and compression.
- Examples: Stretching audio to create unique time-stretched effects, Applying compression to even out the dynamic range of an instrument or vocal.
Quantization
- Purpose: Align MIDI notes to a rhythmic grid for perfect timing.
- Examples: Quantizing MIDI drum patterns to ensure they align with the beat, Tightening up the timing of MIDI basslines for a groove that locks in with the rhythm.
Time Signature Changes
- Purpose: Change the time signature of your project to create rhythmic shifts.
- Examples: Shifting from 4/4 time to 3/4 time for a dynamic chorus effect, Creating complex rhythmic patterns by alternating time signatures.
Audio Routing and Exporting in Logic Pro X
Audio routing is a fundamental aspect of music production that allows you to organize, process, and control various tracks and instrument groups efficiently. In Logic Pro X, creating sub-mixes for different instrument groups can streamline your workflow and add depth to your mixes. This comprehensive guide will walk you through the process, step by step, making it easy to understand for beginners.
Why Use Sub-Mixes?
Before diving into the how, let’s understand the why. Sub-mixes help you manage and process multiple tracks together as one unit. This is especially useful for grouping similar instruments or tracks, like drums, vocals, or guitars. By sending them to a sub-mix, you can apply effects, adjust levels, and maintain a cohesive sound for that group.
Step 1: Organizing Your Tracks
Before creating sub-mixes, it’s essential to organize your tracks logically. Arrange your project so that related tracks are grouped together. For example, place all drum tracks in one section, vocals in another, and so on.
Step 2: Create Aux Tracks for Sub-Mixes
- Go to the “Track” menu and select “Create New” > “Software Instrument” to add an instrument track.
- On the newly created instrument track, click and hold on the “Stereo Out” field, and a drop-down menu will appear. From this menu, select “Create Track” > “Create Aux for Sub-Mix.”
- Name the Aux track something indicative of the group it will contain. For example, “Drum Sub-Mix” or “Vocal Sub-Mix.”
- Now, you’ve created an Aux track that will serve as your sub-mix.
Step 3: Route Tracks to the Sub-Mix
- Select the tracks you want to send to the sub-mix. You can select multiple tracks by holding down the Command key (on Mac) or the Control key (on Windows) and clicking on each track.
- In the Mixer, find the “Sends” section on each selected track. It’s usually found to the right of the fader.
- In the “Sends” section, click on the empty slot where it says “Bus.”
- A list of available buses will appear. Choose the bus that corresponds to your sub-mix (e.g., “Bus 1” for the “Drum Sub-Mix”).
- Adjust the send level to control how much of each track is sent to the sub-mix. This acts as a volume control for the sub-mix.
Step 4: Process and Mix the Sub-Mix
Now that your tracks are routed to the sub-mix, you can process and mix them collectively:
- Insert audio effects on the sub-mix channel to affect all the tracks within that group together. For instance, you can apply EQ, compression, or reverb to the “Drum Sub-Mix.”
- Adjust the faders on the sub-mix channel to control the overall level of the group. This way, you can bring the entire group up or down in the mix.
- Use the pan control on the sub-mix channel to position the entire group in the stereo field.
Step 5: Export and Mixdown
When you’re satisfied with the sound of your sub-mix, you can export it as a single stereo track. To do this:
- Mute all individual tracks that are part of the sub-mix.
- Create a new track to act as the final stereo output.
- Set the input of this track to the same bus as the sub-mix (e.g., “Bus 1”).
- Solo the final stereo output track and adjust its fader to achieve the desired mix balance.
- When you’re ready to export the sub-mix, go to File > Export > Project to Audio File.
- Select your desired export settings, such as file format and bit depth.
- Click “Export” to create a stereo mixdown of your sub-mix.
For more information on mixing and sub-mixing, you can check out THIS GUIDE.
Different Track Types in Logic Pro X
In Logic Pro X, a diverse array of track types provides the foundation for your music production. Each track type serves a distinct purpose and offers a unique set of features to help you shape your sound.
Each of these track types in Logic Pro X serves a unique function, allowing you to record, arrange, and process your music with precision and creativity. By understanding their purposes and applications, you can make informed decisions when selecting and configuring tracks in your projects.
Let’s delve into these track types, explore their uses, and provide examples to illustrate their roles in your projects.
1. Audio Tracks

- Use: Recording and editing audio from microphones, instruments, or external sources.
- Example: Recording vocals, electric guitar, or acoustic drums.
2. External MIDI Tracks

- Use: Sending MIDI data to external hardware MIDI devices.
- Example: Controlling an external synthesizer or drum machine.
3. Software Instrument Tracks

- Use: Hosting and playing virtual instruments or software synthesizers.
- Example: Playing virtual pianos, synthesizers, or orchestral instruments.
4. Drummer Tracks

- Use: Generating drum and percussion patterns with intelligent virtual drummers.
- Example: Adding realistic drum patterns for various music styles.
5. Guitar or Bass Tracks

- Use: Combining MIDI and audio tracks for software instrument and audio processing.
- Example: Playing a virtual synthesizer while recording audio from a guitar.
6. Folder Stacks
- Use: Organizing and grouping related tracks for improved project management.
- Example: Grouping drum tracks, vocals, and guitar tracks into respective folder stacks.
7. Movie Track
- Use: Importing and synchronizing video for scoring to picture or video playback.
- Example: Composing music for a film or video project, ensuring it aligns with the visual elements.
Keyboard Shortcuts in Logic Pro X
Efficiency in music production often comes down to how well you navigate your digital audio workstation (DAW).
Logic Pro X, with its myriad features, is no exception. One of the quickest ways to boost your productivity and workflow is by mastering essential keyboard shortcuts. Let’s dive into a treasure trove of keyboard shortcuts that will supercharge your Logic Pro X experience.
General Navigation
- Spacebar: Play/Pause
- Return: Go to the beginning of the project
- Cmd + R: Toggle Record Enable for selected track(s)
- Cmd + /: Toggle Metronome
- Cmd + B: Toggle Cycle Mode
Track Control
- Cmd + T: Create a new track
- Cmd + D: Duplicate selected regions or tracks
- Cmd + Delete: Delete selected regions or tracks
- Cmd + E: Open the Audio Editor
- Cmd + L: Toggle Track Automation
Editing
- Cmd + C: Copy
- Cmd + X: Cut
- Cmd + V: Paste
- Cmd + Z: Undo
- Cmd + Shift + Z: Redo
- Cmd + A: Select All
- Cmd + I: Open the Inspector
MIDI Editing
- Piano Roll Editor:
- Cmd + A: Select All Notes
- Cmd + C: Copy
- Cmd + V: Paste
- Cmd + X: Cut
- Cmd + R: Repeat
- Score Editor:
- Cmd + 1 to 9: Insert Notes (1 = Whole Note, 2 = Half Note, etc.)
- Cmd + I: Insert Rest
Mixing and Effects
- M: Mute selected track(s)
- S: Solo selected track(s)
- A: Toggle Automation Read/Write mode
- E: Open Mixer
- Cmd + L: Create Track Stack
Navigating the Arrange Window
- Cmd + Arrow Keys: Navigate between tracks
- Option + Arrow Keys: Scroll horizontally in Arrange Window
- Cmd + Option + Arrow Keys: Zoom In/Out horizontally and vertically
Mixing Binaural Audio with Logic Pro X’s Binaural Panner
Creating immersive binaural audio experiences in Logic Pro X can add depth and realism to your projects. The Binaural Panner is a valuable tool for achieving this effect. Here’s a quick guide on how to use it:
1. Setting Up Your Project:
Before you begin, ensure that your project is configured for binaural audio:
- Use stereo audio or instrument tracks for your audio sources.
- Wear headphones for the best binaural listening experience.
- Add the Binaural Panner plugin to the output channel strip of your track. You can find it under Audio FX > Spatial > Binaural Panner.
2. Understanding the Binaural Panner:
The Binaural Panner simulates 3D sound placement and has several controls:
- Position: Move the audio source around the virtual space.
- Orientation: Adjust the direction of the source.
- Elevation: Change the source’s height.
- Distance: Control the perceived distance of the source.
- Width: Adjust the stereo width.
- Spread: Change the source’s angle.
3. Positioning Audio Sources:
Use the Position and Orientation controls to place your audio sources precisely where you want them in the virtual space.
4. Creating Realistic Distance and Height:
Enhance the sense of distance and height with the Distance and Elevation controls. Increase Distance to move the source farther away and adjust Elevation for height.
5. Enhancing Stereo Width and Direction:
For a more engaging mix, manipulate the Width and Spread parameters to control the width and direction of the sound source.
6. Automation and Movement:
To add dynamics to your binaural mix, automate the Binaural Panner’s parameters. Create automation curves for Position, Orientation, Distance, Elevation, Width, and Spread to make sounds move around the listener’s head.
7. Listening and Fine-Tuning:
Always listen critically through headphones and adjust parameters until you achieve the desired spatial effect.
8. Exporting Your Binaural Mix:
Once satisfied, export your binaural mix as a stereo audio file. Include metadata specifying that it’s a binaural audio mix for proper playback.
For a more in-depth look at binaural audio mixing in Logic Pro X, check out our comprehensive guide HERE.
Mixing binaural audio can elevate your projects, offering a captivating listening experience that immerses your audience in a three-dimensional world of sound.
Troubleshooting Common Errors in Logic Pro X
Even the most seasoned music producers encounter challenges when working with Logic Pro X. From mysterious audio glitches to confusing error messages, these issues can disrupt your creative flow. Fear not; we’ve compiled a list of some of the most common errors users experience and their solutions to help you navigate these bumps in the road.
Audio Dropouts and Glitches
Issue: You’re in the groove, and suddenly, your audio playback stutters or drops out.
Solution:
- Increase Buffer Size: Navigate to Logic Pro X > Preferences > Audio and increase the I/O Buffer Size.
- Free Up System Resources: Close unnecessary background applications and processes consuming system resources.
- Optimize Plugin Usage: Reduce the number of active plugins and virtual instruments in your project.
- Lower Sample Rate: Lower the project’s sample rate if you’re experiencing excessive audio dropouts.
MIDI Latency
Issue: You notice a delay between hitting a MIDI controller key and hearing the sound in Logic Pro X.
Solution:
- Reduce Buffer Size: Decrease the I/O Buffer Size in Preferences > Audio to reduce MIDI latency.
- Use Low-Latency Mode: Enable Logic Pro X’s Low-Latency Mode for real-time performance without latency.
- Free Up CPU Resources: Close background processes and lower the CPU load by freezing or bouncing tracks.
Crashes and Freezes
Issue: Logic Pro X crashes or freezes unexpectedly.
Solution:
- Update Logic Pro X: Ensure you’re using the latest version with bug fixes and improvements.
- Check Plugin Compatibility: Some third-party plugins may cause instability; update or remove problematic plugins.
- Reset Preferences: If issues persist, try resetting Logic Pro X preferences by holding down Option + Command while launching the software.
No Sound Output
Issue: You can’t hear any sound from Logic Pro X.
Solution:
- Check Audio Output Settings: Go to Preferences > Audio and verify that the correct output device is selected.
- Adjust Track Output: Ensure track output settings are correctly routed to your audio interface or built-in output.
- Inspect Mixer: Make sure individual track levels are not muted or turned down in the Mixer.
Missing or Corrupted Files
Issue: You encounter missing audio files or corrupted project files.
Solution:
- Backup Projects: Regularly back up your Logic Pro X projects to prevent data loss.
- Use External Drives: Store audio files on external drives to avoid clutter and potential corruption of project files.
- Check File Locations: If files are missing, locate them manually or use Logic Pro X’s built-in File Management tools.
CPU Overload
Issue: Your project hits a CPU overload, causing audio dropouts and glitches.
Solution:
- Freeze Tracks: Freeze tracks you’re not actively working on to reduce CPU load.
- Bounce in Place: Bounce MIDI or instrument tracks to audio to lighten the processing load.
- Optimize Plugins: Use less CPU-intensive plugins or freeze tracks with heavy processing.
Automation Issues
Issue: Automation curves don’t behave as expected.
Solution:
- Check Automation Modes: Ensure the correct automation mode (Read, Write, Touch, Latch) is selected.
- Edit Automation Points: Manually adjust automation points for precise control.
- Reset Automation: Reset automation data for a specific parameter if needed.
Remember, patience and persistence are key when troubleshooting issues in Logic Pro X.
Each challenge is an opportunity to learn and refine your production skills. By following these solutions and exploring Logic Pro X’s extensive community and resources, you’ll overcome hurdles and continue to create music with confidence.
Final Thoughts
As you’ve embarked on this journey to uncover the immense potential of Logic Pro X, you’ve taken a significant step toward realizing your musical aspirations.
Logic Pro, the trusted choice of professionals, has unraveled its secrets and capabilities before you, opening a world of creativity and sonic possibilities.
In this comprehensive guide, we’ve delved into the depths of Logic Pro X, demystifying its features and unveiling the tools that empower you to craft music that resonates with the world. From composing soul-stirring melodies to engineering intricate beats and mastering your tracks for a polished release, you’re now equipped with knowledge and skills that were once the domain of seasoned professionals.
But here’s where your journey takes an even more exciting turn.
We’ve subtly alluded to the prospect of turning your passion for music into something more – something that transcends a hobby and transforms into a fulfilling career. While this guide has provided you with a strong foundation, we also offer an exclusive online course designed especially for beginners.
This course will not only accelerate your learning curve but also reveal the path to a promising career in music production.
So, as you wrap up this reading experience and ponder the immense possibilities that Logic Pro X presents, we encourage you to consider taking the next step. Explore our online course at Decibel Peak, the educational resource trusted by passionate music producers like yourself.
It’s the gateway to nurturing your musical talents, honing your skills, and setting out on a journey filled with boundless possibilities.

The stage is set, the possibilities are limitless, and your future in music production is awaiting your embrace.
Join us in this inspiring journey today, and let your passion for music become your reality.


2 thoughts on “How To Use Logic Pro X: Beginner’s Guide”
Mr.Stefan Chamberland
Good Morning
Today It happened to see your worthful guide for beginners in Logi Pro X. Really it is so useful for new comers to the Sound Engineering Subject. It is appreciated and I am thankful to you for the great work you have done.
I am S Gopala krishna , (aged person) from India , much interested in Sound Engg course.
Thank you
Sincerely
Gopala Krishna
Email: [email protected]
Hey Goapala,
That’s great, I’m so glad to hear you found my guide helpful!
Is there anything in particular you’d like to focus on in regards to learning?
I do have a course on mixing and mastering music in Logic Pro X if you’re interested. You can check it out HERE.
Let me know if you have any questions. Thanks for sharing!
– Stefan