


You’ve most likely heard of the Logic Remote App, but if you’re not using iOS you’ll be pretty disappointed to know that it’s not compatible with Android devices. That’s why I began searching for an alternative for those of us wanting to control Logic Pro with Android. It took some time, but I finally found the solution and it’s much simpler than you think!
The best way to control Logic Pro with Android is to use an application called TouchDAW. It’s available for both Android AND iOS, so it’s an excellent alternative to the Logic Remote App in general. However, it does require some configuration. That’s where I come in. In this guide, we’ll be going through the process together so you’ll definitely want to keep reading!
- Controlling Logic Pro with TouchDAW Demo vs TouchDAW Pro
- Configuring TouchDAW for Logic Pro (or any other DAW)
- Controlling Logic Pro with Android through MIDI networking
- Assigning TouchDAW to Logic Pro’s key commands
- Why would you even need to control Logic Pro remotely?
Controlling Logic Pro with TouchDAW Demo vs TouchDAW Pro
The first thing you’ll want to consider is that TouchDAW is available for FREE. However, the free version does come with some pretty restrictive restrictions (like the inability to press record). That somewhat defeats the purpose of controlling Logic Pro remotely, doesn’t it?
Well, you’ll be relieved to know that the full version is only $5.99 (it’s a NO BRAINER if you ask me).
The only reason they provide us with the free version is simply to make sure it works. So, that’s what I recommend doing before purchasing the full version…
Testing it out!
That’s what I did and found out that it was in fact compatible with my system. It took some configuration (maybe 30 minutes at most) which we’ll be getting into soon. For now, you simply need to start by downloading “TouchDAW Demo” from the Play Store/App Store.
Once you’ve done that, you’re ready for the next step!
Configuring TouchDAW for Logic Pro (or any other DAW)
Before moving on to the computer, you’ll want to start by opening TouchDAW. It may seem overwhelming at first, but just focus on the settings for now (which can be located at the top-left corner of the screen).
The only thing you’ll need to change is the sequencer.


By default, it’s been set to Cubase 7.5 (unless that changes at some point). You’ll simply want to select Logic as your sequencer (or your current DAW). If you’re accustomed to working with different DAWs, you’ll need to switch this setting each time.
That being said, you now know that TouchDAW is compatible with pretty much every DAW.
That’s something we CAN’T say about the Logic Remote App.
Controlling Logic Pro with Android through MIDI networking
Great, we’re now ready to start creating our MIDI network using the Audio MIDI Setup App. If you can’t find it, you can simply search for it. It’s included by default with every installation of Mac OS X.
Once you’ve got that opened up…
- Click on the “Window” tab and select “MIDI Studio”
- Click on the “MIDI Studio” tab and select “MIDI Network Setup”


Now, you should have this window opened up:

The first thing you’ll want to do is create TWO sessions. You can name them whatever you like, but I recommend naming them “TouchDAW_daw” and “TouchDAW_midi”. Make sure to ENABLE both of these sessions.
After you’ve done that, you simply want to make sure you’ve restarted Logic Pro for it to detect these virtual inputs/outputs (if it hasn’t done so already).
The next thing you’ll want to do is to open TouchDAW and make sure you’re connected to the same Wi-Fi network as your computer (IT’S MANDATORY).
Note: VPNs will cause conflicts since it changes your IP address.
If done correctly, you should see two channels appear in the directory.

You’ll simply want to connect each one to its respective session:
- RTP 1 goes to “TouchDAW_daw” (input)
- RTP 2 goes to “TouchDAW_midi” (output)
Once that’s done, you can safely exit the Audio MIDI Setup App.
Note: You’ll need to go through this process each time you want to reconnect (like when launching TouchDAW). I recommend leaving Audio MIDI Setup open throughout the duration of your remote session.
We’re ready for the final step!
Assigning TouchDAW to Logic Pro’s key commands
Using the FREE version of TouchDAW, I still wasn’t able to control Logic Pro after following all of these steps. It seems that I needed to manually assign each parameter (because Logic reads TouchDAW like MIDI notes) for it to work.
However, I recommend NOT wasting your time with this.
It seems like the full version was configured automatically (for me, anway).
The only thing you need to do is make sure it’s working. That being said, we’re only going to assign the “Play” button for this test run before deciding if the full version is right for us. Feel free to assign more parameters though!
So, you’ll need to click on the “Logic Pro X” tab and select “Key Commands”.

Once that’s opened up, you want to locate the “Play” button and click “Learn New Assignment”.

Just press the play button in TouchDAW and it should detect the input.
If it hasn’t detected anything, make sure that Logic Pro is receiving MIDI from TouchDAW. Just press buttons in TouchDAW and pay attention to the center display. When you trigger MIDI notes with a keyboard, for example, they usually show up there.
If it’s still not working, you may want to leave me a comment so I can further assist you!
Why would you even need to control Logic Pro remotely?
Once you’ve gone through all these steps, you should be capable of controlling Logic Pro with Android devices, whether it’d be your phone, tablet, Chromebook, etc… However, you may be wondering why you’d even want to control Logic Pro remotely.
On the other hand, you may know EXACTLY why.
Either way, I’ll tell why I personally needed to control Logic Pro remotely. The realization came to me once I was ready to record drums and then…
How do I press “Record” from all the way back here?
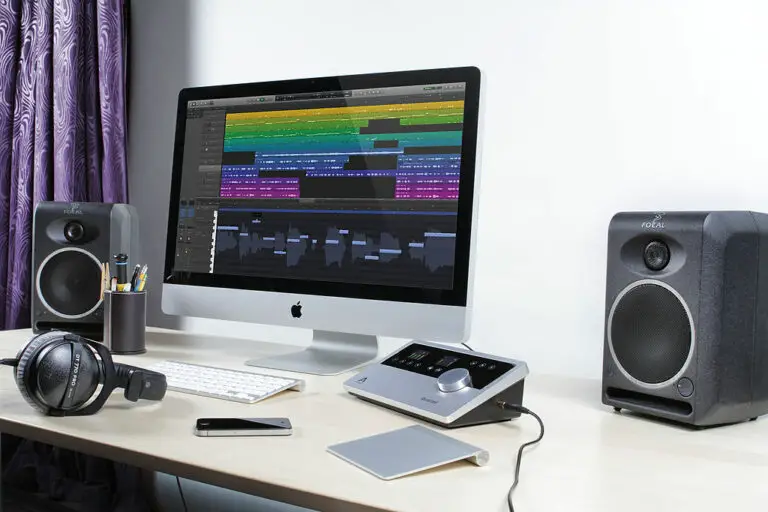
For those of us using desktop computers (like my Mac Mini), it’s not always convenient to record instruments that are placed further away from the screen/keyboard/mouse. The only other way would be to use a laptop right next to the drum kit.
Either way, even instruments that are recorded closer to my workstation could benefit.
I can’t stand reaching over to my mouse and keyboard while recording guitars!
That’s why I’m so grateful to have found this solution! Controlling Logic Pro using my Android smartphone has made the process MUCH more efficient and pleasant. It’s also worth noting that TouchDAW includes EVERYTHING you’d ever need…


- MIDI Keyboard
- Drum Pads
- Mixing Console
- Transport Bar
There’s even more where that came from, but I leave the rest of the exploration to you!
If you need any assistance setting up, don’t be shy. Leave me a comment and I’d be more than happy to help you set up your first MIDI network using TouchDAW!
I hope you’ve found this guide on setting up a MIDI network using TouchDAW useful. I was honestly starting to consider buying a cheap iPod Touch just to have access to Logic Remote, but that’s not necessary! If you’ve got some patience, I’m sure you’ll be much more satisfied with TouchDAW in the long run. Don’t forget to share this post if you think it’ll help someone else and as always, thanks for reading!
Sources:


6 thoughts on “How To Control Logic Pro With Android | MIDI Network Setup Guide”
Hi, Does it work with GarageBand? There doesn’t seem to be an option to select garageband on the touchdaw app, but my MacBook recognises it. I have a Samsung phone. I followed your steps far as >select key commands > learn new assignment. Garageband doesn’t seem to have a key commands option that I could find.
Hello Ian,
I did some research for you and it seems like you’ll have lots of difficulty getting it to work with GarageBand.
It’s because GarageBand doesn’t support Mackie MCU and doesn’t include Logic Control like Logic Pro does. Even those that have attempted to copy/paste the Mackie MCU support file from their Logic Pro installation forlder to GarageBand only got it to work partially (or not at all). It’s not TouchDAW’s fault, it’s just that GarageBand has limitations.
Considering the fact that you’re using a MacBook though, you could easily place it wherever you are. There’s really no need to use something like TouchDAW unless you’ve got a desktop.
Instead of spending the money on TouchDAW, I recommend purchasing some sort of stand for your MacBook like this one.
I hope that helps, thanks for stopping by! Let me know if you need anything else.
– Stefan
Hey. I was going step by step. But i canot conect :/ Can you help me please?
Hey Kalvis,
Thanks for reaching out. Let’s start with a checklist…
– Are you using the same Wi-Fi network to connect both your computer and device? If your computer is connected via ethernet, it may not work.
– Are you using some sort of VPN/Firewall? Make sure that’s disabled.
If it still doesn’t work, I’m going to need more information. If you’re willing to be patient, please send that info along with any screenshots at [email protected] and I’ll guide you through the process.
If you’d rather have something quicker, feel free to schedule a 1-on-1 consultation with me over Zoom. I can also reduce the rate if you’d prefer 30 minutes of my time instead.
Either way, let me know by email how you’d like to proceed. I look forward to assisting you and getting this up and running!
– Stefan
HI. I’ve been searching for a way to use either my old ipad air from 2013, or my android phone to control logic pro x if I’m sitting at my drum set in the middle of my bedroom. This is the only option I’ve been able to find that would work with the devices I have. (I was looking at logic remote but I can’t update my ipad to ios 13).
Thank you for writing this article and explaining everything so well! Shame there are so many steps to go through, but it seems worth a try at least.
Hello Chris,
I’m glad you found my solution useful. It’s not as simple as Logic Remote, but it actually provides much more flexibility/customizability.
Once you get everything set up for the first time, it’ll be easier.
Let me know how it goes! If you need any help along the day, just reply to my comment.
Thanks, take care!
– Stefan