If you haven’t heard of the Roland TR 808 drum machine, it’s where the 808 bass originated from. However, recreating this iconic sound is easier than ever, so today we’re learning how to make an 808 Bass in Logic.
We’re going to be using the Alchemy synthesizer included with our DAW. But, will I be able to follow along if I’m using different software? For the most part, YES. The 808 bass is basically a “sine wave” with a specific “envelope”.Every synthesizer will offer you at least ONE oscillator to work with and an envelope. There are TWO main components to the sound we will be creating…
- The “Click” | This was designed to emulate the sound of a kick drum’s beater hitting the drum head.
- The “Sustain” | This was designed to emulate the decaying “thump” of a kick drum.
In theory, this isn’t very difficult to achieve, but Alchemy can be a little overwhelming at first. So I’m going to be outlining the steps to creating an 808 bass in sections. If you haven’t gotten the chance to use Alchemy yet, this will serve a great introduction! Alright, let’s make an 808 bass in Logic Pro X!
- Using Alchemy to create the foundation
- Making an 808 bass in Alchemy
- How to make an 808 bass: Modulation
- How to make an 808 bass: Envelope
- Should I use compression on my 808 bass
- The essence of Hip-Hop music
Using Alchemy to create the foundation
Apple’s Logic Pro X comes with a variety of powerful software instruments. Right out of the box, you’ll be capable of creating some inspiring sounds for your projects.
So the first thing we’re going to need to do is create a “software instrument” track and load up and instance of Alchemy.
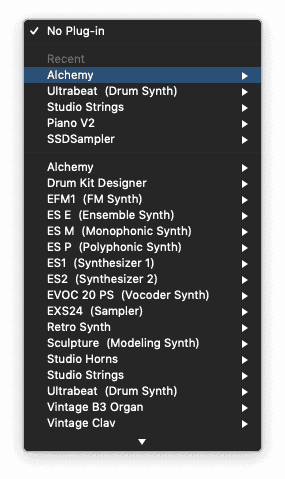
Once you’ve inserted your instrument plugin, you’ll need to open the GUI so we can start working on our “preset”.
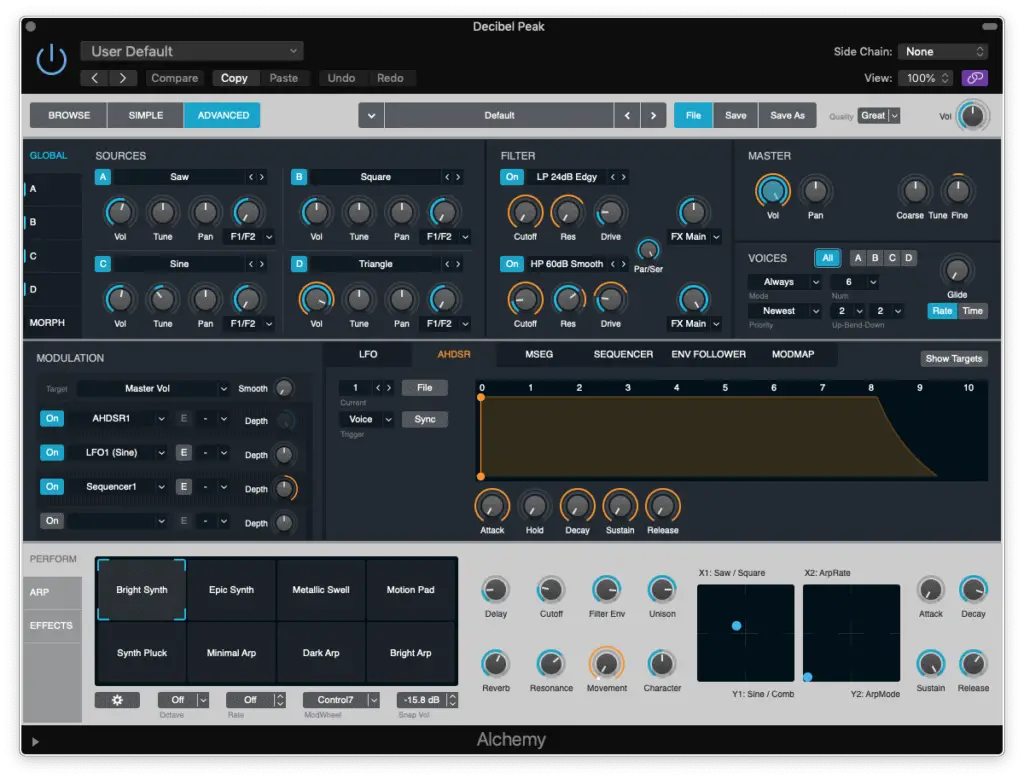
By default, you’ll already have a “patch” loaded in Alchemy.
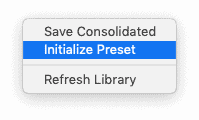
We’re going to need to create a “blank canvas” to work on, so click on “advanced” and then “initialize preset” under “file”.
This is what your synthesizer should now look like…
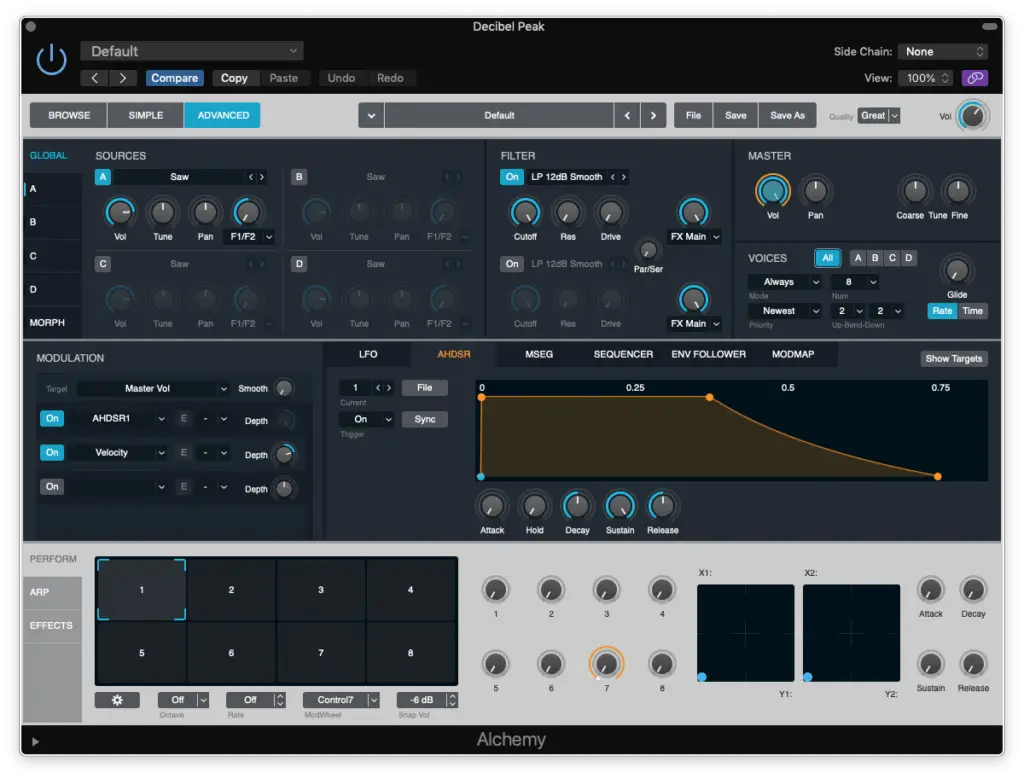
Great, now we’ve created the foundation for our 808 bass.
If you’re using different software, you’ll want to click “initialize preset” as well. Every synthesizer I’ve worked with in the past had this option.
Let’s move on to the top portion of our synthesizer (Sources, Filter and Master).
Making an 808 bass in Alchemy
We’re only going to be needing ONE oscillator to make an 808 bass (although Alchemy has FOUR). If you’re using a different synthesizer, make sure that your other oscillators are “turned off”.
So the first thing we’re going to do is swap that “saw wave” for a “sine wave”.
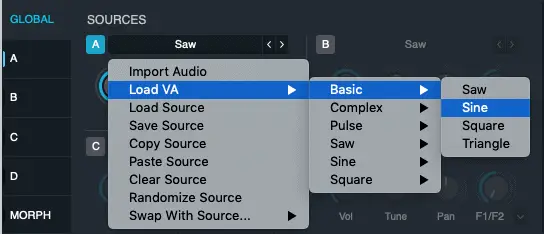
The “sine wave” is actually the purest tone because it produces NO overtones. It should already start sounding like a “sub-bass”.
Next, we’re going to be looking at Alchemy’s “filter” section…
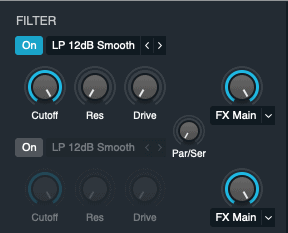
This is what it looks like right now, but we’ll need to make some changes.
Let’s set our “cutoff” to approximately 250 Hz, our “resonance” to 50% and our “drive” to 50% as well.
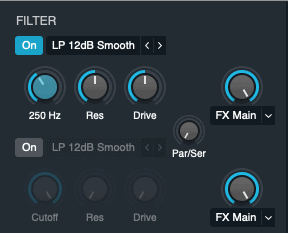
Excellent, now we’re moving on to Alchemy’s “master” section…
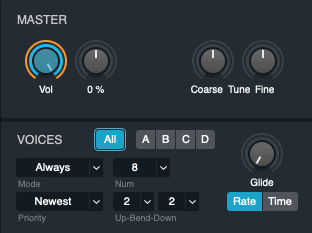
This is what you’ll get by default, but once again, we have a few small modifications to make.
We need to turn this into a “monophonic” synthesizer by setting our “voice mode” to “retrigger” and setting the “number of voices” to 1.
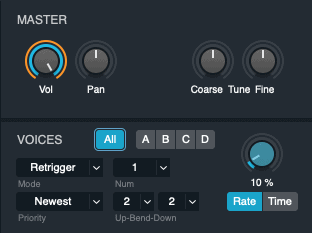
You may have noticed that I also introduced some “glide”, but this is optional (to get that “sliding effect”).
Great, our 808 bass is coming along nicely, but we still need to address our “modulation”.
How to make an 808 bass: Modulation
Since the Roland TR 808 drum machine was NOT velocity-sensitive, we need to reproduce this. If we simply ignored this, our 808 bass would be affected by how “hard” we hit our keys.
If you would like to preserve this quality, ignore this step…
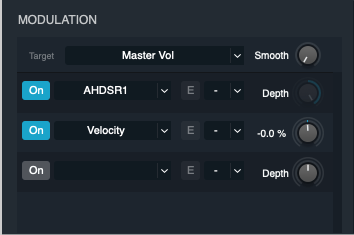
We’ve basically just set our “velocity” from 50% to 0% targeting our “master volume”.
Now we need to target our “master tune” to make a few changes…
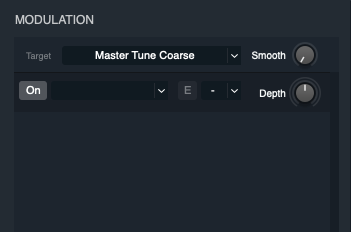
This is what it should look like by default, but let’s go ahead and insert an “MSEG1”.
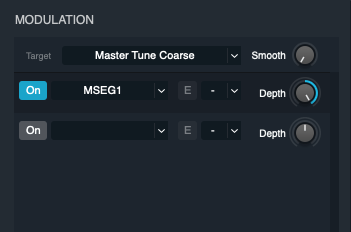
We’ll also need to set the “depth” to maximum.
Now that we’ve completed all these steps, we only need to work on our “envelope” and that’s it!
How to make an 808 bass: Envelope
Right now, your “preset” should sound pretty close to an 808 bass, but we’re still missing that “click”. We’re going to need to modify our “envelope” to achieve this.
If you take a look at the “MSEG envelope”, it will look like this…

After making these TWO changes, we’ll be 99% of the way there!

AND…

Can you HEAR the difference that made?
Perfect, now let’s just add some “release” time in our “AHDSR envelope” and we’re done.

I personally use about 6 seconds, but it will depend on the sound you want to achieve.
And there you have it, we’ve just created an 808 bass in Logic Pro X.
Should I use compression on my 808 bass?
You’ll notice that certain frequencies may sound louder than others as you play with your new instrument. This is why I recommend you use some compression on your 808 bass to make it level it out.
It will also make it cut through your mix a lot better.
I didn’t make things more complicated than they needed to be, so I used some of Logic’s default “presets”.
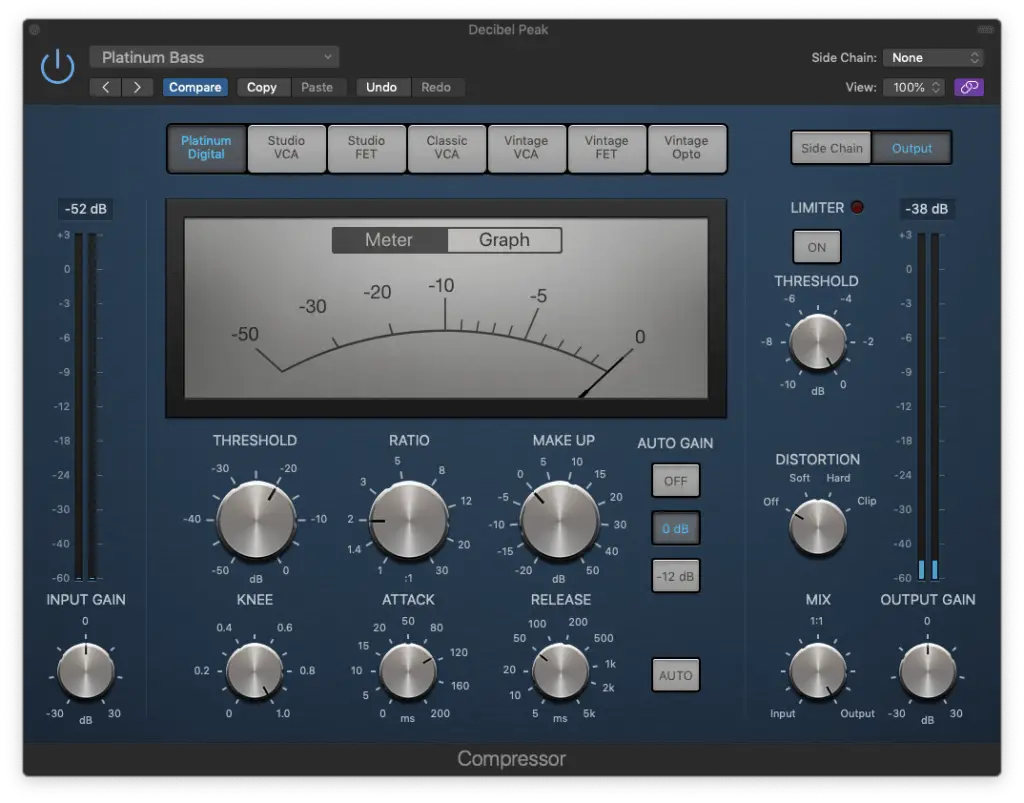
This one is my personal favourites, but this next one sounds a bit “dirtier”…
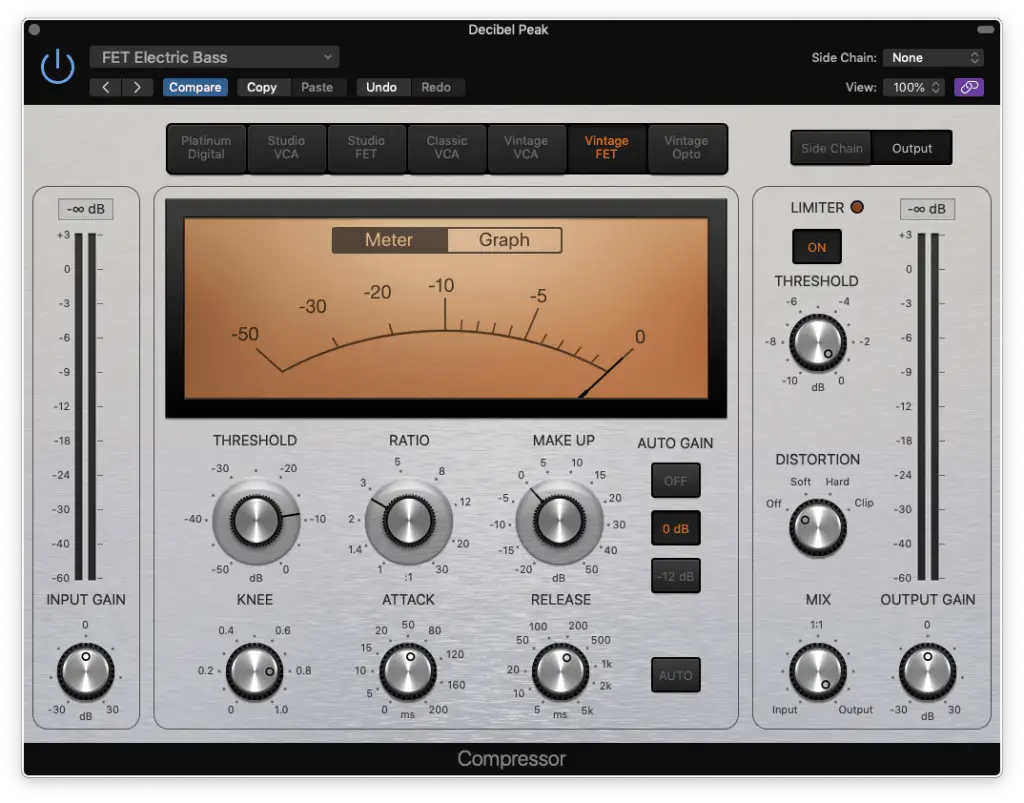
There are other “presets” you can experiment with as well, so play around with them.
You can also personalize your 808 by adding some saturation as well. Alchemy has some integrated effects, but you can use any plugin you like.
The essence of Hip-Hop music
Now that you’ve got yourself an 808 bass, I suggest you save this “preset” as your own. You’ll be able to use it on all your projects, but specifically, anything to do with Hip-Hop.
The 808 bass has become a staple in various sub-genres as well such as Trap.
You now possess the foundation to create all these different genres of music.
I hope this tutorial has been of great value to you and if it has, please share it with someone. If you have any questions, feel free to post them in the comments section. Go out there and make some great music with what you’ve learned!








6 thoughts on “How to Make an 808 Bass in Logic | Logic Pro X Tutorials”
In the MSEG envelope, where do I make the second change that you made? when i do it, it just deletes the change that I copied from the first picture of that section if that makes sense
Hey Jack,
Check the other comments, I’m pretty sure this issue has already been resolved.
Make sure the parameter you’re affecting is selected and is STILL selected.
If that doesn’t work, I need more details. I’ll try to guide you as best as I can.
Thanks for stopping by!
– Stefan
I’m not able to find “Master Tune Coarse” under the modulation thing. The dropdown menu there only says “Master> Amp” and nothing happens if I click that. hah.
Hey Chase,
You’re right, something must’ve changed with one of the recent updates, BUT…
I found a fix!
Just go to the “master” module and right-click the “coarse” knob. Select… Add Modulation > MSEG Env > MSEG 1.
It should add that target to the “modulation” module.
I hope that helps, let me know if you have any questions. Thanks!
– Stefan
I HAD THE SAME EXACT PROBLEM U DONT UNDERSTAND HOW FRUSTRATING IT WAS LOL THANK U SO MUCH
Hey man, I’m glad it helped! LOL
– Stefan