Recording Levels: Digital Recording | Should you be Tracking at -18 dBFS?

This post may contain affiliate links. For more information, see our disclosure here.

I was taught in school to set my “input levels” as high as possible (without clipping, of course). However, I learned later on that when it comes to recording levels: digital recording isn’t the same as analog recording.

Contrary to popular belief, setting your levels as high as possible will NOT give you the best results. Back in the days of analog recording, sound engineers did so as a tactic to combat the “noise floor”. The signal-to-noise-ratio was much more of an issue than it is with today’s digital hardware. As you read through this article, you’ll realize that there are NO advantages to setting your levels as high as possible. I will be sharing what I believe to be the optimal recording level based on some extensive research. There were actually TWO reasons that convinced me, so I hope they’ll justify what I have to say. If you’ve ever been debating the issue yourself, this text will definitely provide some relief. Let’s get started!

Setting recording levels to optimize the signal-to-noise ratio

Inherent to electronic circuitry is the presence of what we refer to as the noise floor. By measuring our signal’s amplitude against the noise floor, we obtain what’s known as the signal-to-noise-ratio.

Back in the days of analog recording, achieving the best signal-to-noise ratio was challenging.

However, the noise floor has become virtually inaudible since the advent of digital recording. In other words, we no longer need to set our levels “as high as possible” to compensate, BUT…

This would be important if you were using analog amplification.

You’d need to adjust the gain for each point of amplification to minimize noise and distortion (clipping). This is what we refer to as gain staging OR gain structuring.

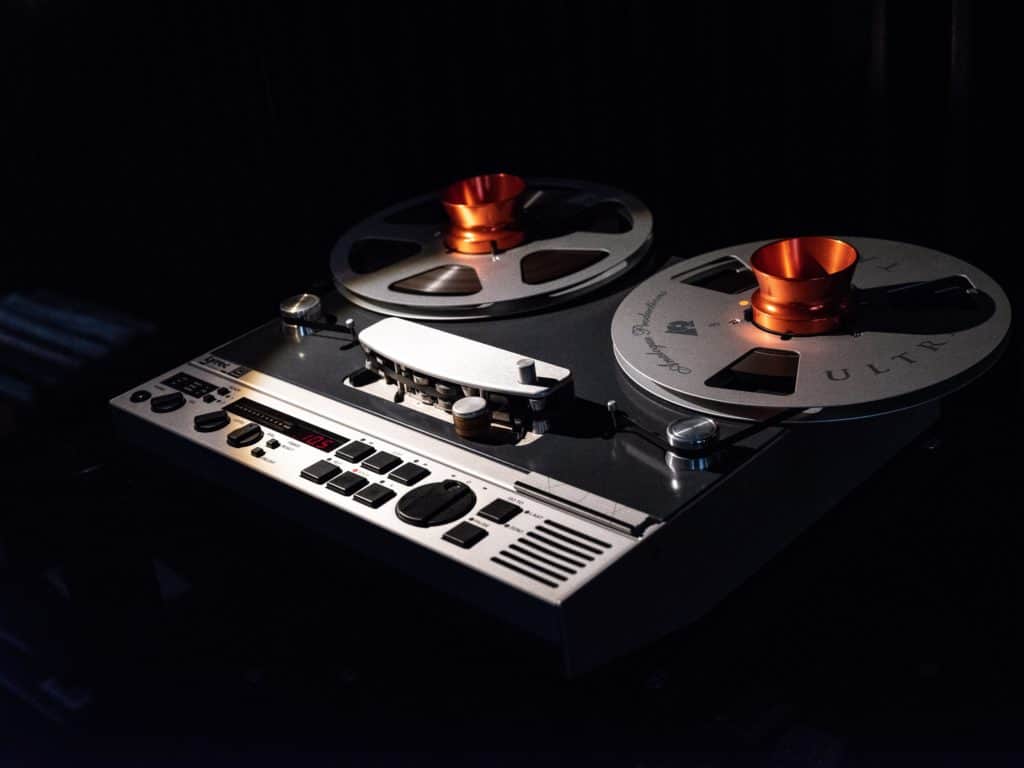
However, unless you were using an analog mixer and/or a tape machine, you won’t need to be as tedious with this process.
ingo schulz mwWZTLr9Tcg unsplash - Decibel Peak

In the digital world, the only thing we need to avoid clipping is our analog to digital converters (ADC).

However, once your signal has reached your digital audio workstation (DAW), it may still have accumulated noise from…

  • Microphones
  • Pre-amplifiers
  • Instrument pickups
  • Unbalanced cable runs
  • Effects processors
  • Amplifiers

As you can see, each ingredient we add to the mix has the potential of introducing noise. This is because everything that happens BEFORE your audio interface is technically analog.

For now though, we’re only focusing on setting our interface’s levels appropriately.

dBVU meters vs dBFS meters

Analog equipment can actually benefit from setting levels as high as possible. If you’ve ever used valve/tube amplifiers, you know that pushing the gain can distort it in a pleasant way.

In other words, clipping ever so slightly in the analog world produces what we refer to as saturation.

However, clipping in the digital world will produce anything but favourable results. That’s why setting your levels as high as possible has NO advantage.

If anything, you’ll actually encounter TWO major problems by doing so (more on this later).

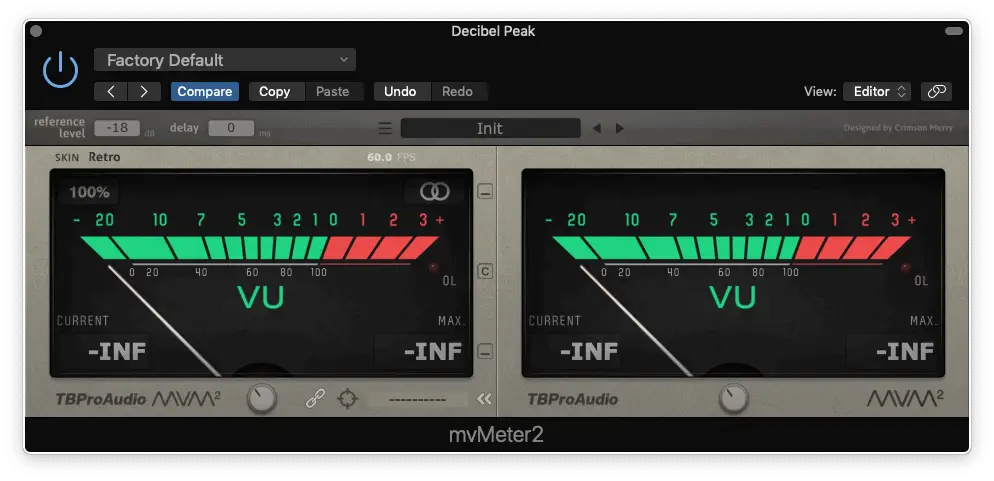
The first thing we need to understand is that dBFS metering wasn’t always the standard for measuring amplitude. Back in the day, sound engineers were measuring amplitude using dBVU meters.

You know… the one with the bouncing needle.
recording levels digital recording

Here’s the shocking truth though… 0 dB VU ≠ 0 dB FS

Actually, most analog equipment was calibrated to average -18 dB FS.

What does this mean?

Well, it appears that sound engineers had been recording at much lower levels than we expected. Does this mean that we should be setting our input levels to average -18 dB?

Optimizing your signal using VU meters

To answer the previous question… YES, we should be setting our input levels to average -18 dBFS. However, this does not mean that your track cannot peak any higher than -18 dBFS.

Keep in mind that dBVU meters use RMS (root mean square) to calculate the AVERAGE amplitude.

In other words, you can have your tracks peaking at -6 dBFS, but the average amplitude will remain -18 dBFS. So, how can you start metering your tracks using this method?

Although there are many dB VU meter plug-ins out there, the mvMeter2 from TBProAudio is my favourite. Did I mention that it’s FREE?

Have you got your dBVU meter plug-in yet? Great, let’s get started!

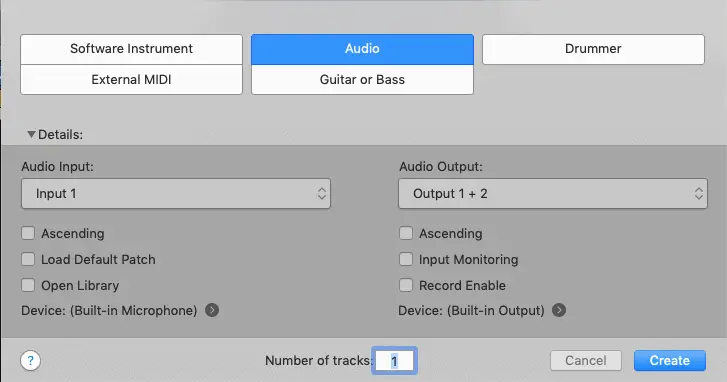
Step 1 | Create an audio track
Screen Shot 2019 09 13 at 12.08.20 AM - Decibel Peak

Step 2 | Set your track’s fader to unity gain (aka 0 dBFS)

Screen Shot 2019 09 13 at 12.09.30 AM - Decibel Peak

Step 4 | Insert a dBVU meter in effects slot 1

Screen Shot 2019 09 13 at 12.04.10 AM - Decibel Peak

Step 5 | Calibrate your plugin to -18 dBFS (this should be done by default)
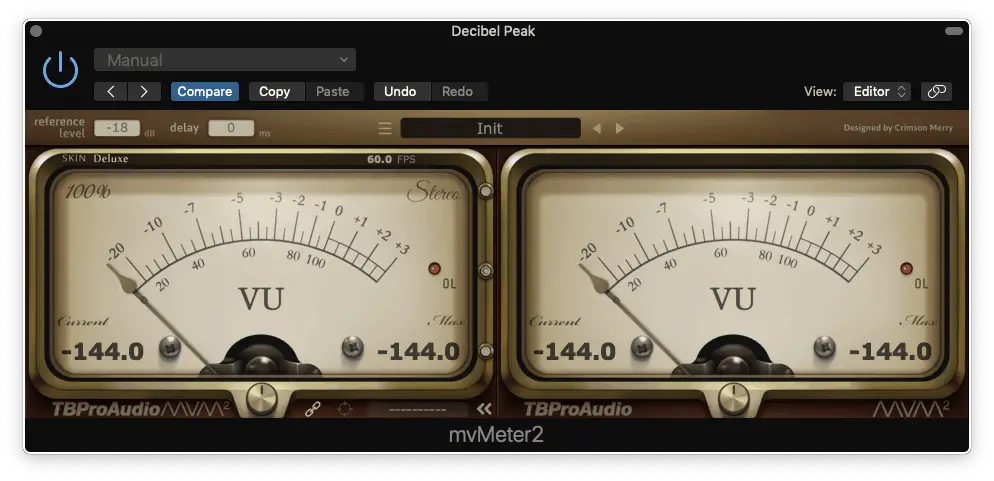
recording levels digital recording

Step 6 | Set your preamp’s levels to average 0 dBVU (it’s okay if it goes over a little)
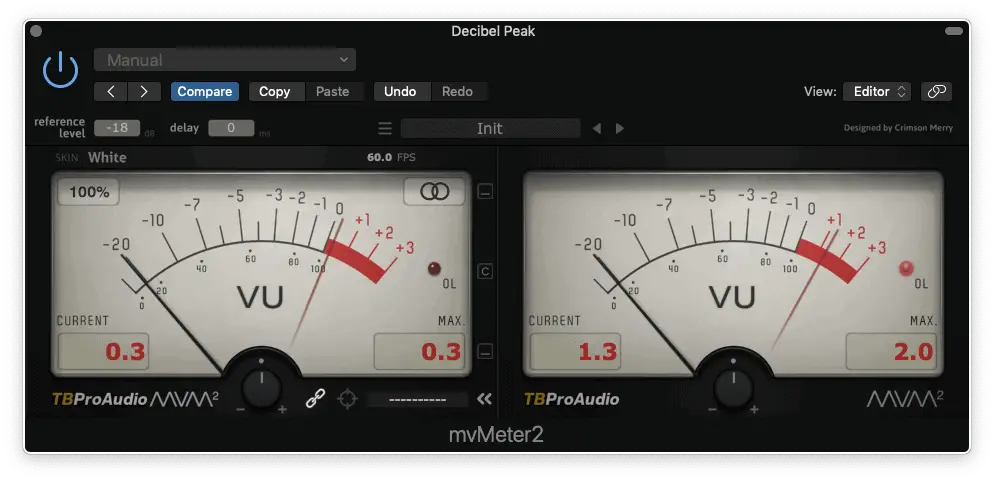
recording levels digital recording

It’s as simple as that! Repeat this process for ALL your tracks… ALWAYS.

But what if I’m working with a track that has been recorded over this threshold? If you’re mixing other peoples’ work, this will most likely be the case (unless they’re professionals).

You’ll instinctively want to lower your mixer’s faders, but this will only affect the output.

There’s an easy fix to this common problem…

Step 1 | Set your track’s fader to unity gain (aka 0 dBFS)

Screen Shot 2019 09 13 at 12.09.30 AM - Decibel Peak

Step 2 | Insert a dBVU meter in effects slot 1

Screen Shot 2019 09 13 at 12.04.10 AM - Decibel Peak

Step 3 | Calibrate your plug-in to -18 dB FS (this should be done by default)

recording levels digital recording

Step 4 | Set your track’s clip gain to average 0 dBVU (it’s okay if it goes over a little)

recording levels digital recording

You can also use a trim plugin or a dBVU meter that includes this feature. This will be affecting your signal’s input, which is what we need. 

But now we need to answer the BIG question… Why is all of this so important?!

Setting your recording levels to -18 dBFS: 2 reasons

Now, I’m sure you’re begging to know why -18 dB is so important. I mean, why can’t we record at -6 dBFS like we’ve been taught in school? You can let me know in the comments if you agree or disagree!

Reason #1

Plug-ins that emulate analog equipment have an optimal “nominal operating level”. In English, this simply means that if you exceed a certain threshold, they won’t sound as good.

If you don’t believe me, read page 17 of the instruction manual for Slate Digital’s Virtual Tape Machines.

Remember, analog equipment uses 0 dBVU which is usually the same as -18 dBFS on average. In other words, tracks that exceed this level will distort (clip) your plug-ins.

You may not notice a difference if you’re using standard digital plugins, but there’s another problem…

Reason #2

By setting your levels as high as you can, you’ll be clipping your master bus one you’ve got multiple tracks. As I mentioned before, you’ll instinctively want to bring down your mixer’s faders, BUT…

The further away you move from “unity gain”, the less resolution you’ll get from your fader.

You may have noticed that your meter isn’t linear, it’s logarithmic. This one starts in increments of 3, then moves up to 5 and finally to 10.

Screen Shot 2019 09 13 at 12.04.10 AM - Decibel Peak

This’ll become a problem during the automation stage… Instead of increments of say, 1 dBFS, you’ll be working in increments of 10 dBFS. In other words, you won’t have as much accuracy as you would have by staying in the top portion of your fader.

Are you convinced yet?

Setting recording levels for digital recording

I remember hearing about this shocking truth a couple of years ago. I wanted to believe it, but I needed to have some concrete evidence.

These were the TWO reasons that convinced me to make the transition to -18 dBFS.

However, you could technically record at any amplitude as long as you don’t clip your converters. You could always reduce the volume in your recording software, right?

I used to work this way, but I can’t imagine myself ever looking back. I mean, we now know that there are NO advantages to recording “hotter” in the digital world.

Only disadvantages…

So, hopefully this has given you a new perspective on sound recording! What do you think about recording at -18 dB FS, does it resonate with you? Let us know in the comments and feel free to share your personal approach to setting levels.

Stefan Chamberland

Stefan Chamberland

Stefan is a highly proficient sound professional who specializes in sound for picture. His journey into sound production began at the young age of 16, where he initially produced music that went on to feature on local television. Today, Stefan utilizes his extensive expertise to record production sound and lead the audio post-production process for a variety of projects in the TV, Film, and New Media industry. Driven by his passion for sound for picture, Stefan founded Decibel Peak, a platform designed to empower and support emerging sound professionals while contributing to the growth of the industry.

22 thoughts on “Recording Levels: Digital Recording | Should you be Tracking at -18 dBFS?”

  1. Hello Stefan,

    Great article! I’m a beginner and thanks to you, finally I understand (clearly) how to set my gain!

    I also find very useful the section regarding working with a track that has been recorded over the -18 dBFS threshold.

    Thank you!

    Reply
    • Hey Jean-Maxime,

      I’m glad to hear that the article was helpful. If you ever have any more questions or have requests for future articles/videos, feel free to reach out!

      Thanks, all the best!

      – Stefan

      Reply
  2. What about quantization noise? If I’m sampling at 16b/44.1KHz, a full range signal will use up all 16 bits of that range. If I never get above half scale (3dB, correct me if that isn’t right), then I’m really capturing a 15b signal. Each 3dB attenuation means one bit less capture. Say your signal is compressed and thus the peak doesn’t vary that much — it seems like -18dB means giving up six of the sixteen A/D bits, leaving effectively only a 10 bit capture.

    Yes, once that signal is inside the DAW, the DAW is probably using floating point for everything, but the dynamic range of the original, captured wave is only 10b.

    Reply
    • Hey Jim,

      Most of us are recording at 24-bit nowadays, so it becomes even less of an issue.

      As I say in the article, these optimal levels are only really important if you’re recording into vintage analog gear (outboard). Once it’s in the DAW and you’re using analog modelled plugins, you can simply reduce the level of your clip and you’d preserve all the bits.

      To be completely honest though, you might be overthinking it and I’ve never had any issues recording this way.

      My recommendation… Enjoy the process and use your ears. If you hear you’re losing bit depth, you can throubleshoot then.

      Thanks for your comment, all the best!

      – Stefan

      Reply
  3. -18dbfs because you have lots of soft volume gain to work with and you are not distorting output but mastering and your limiter not working hard enough, and you got smooth vanilla

    Reply
  4. My main question is if I have +24 db headroom on my adc and dac would it be ok to reference 0 dbvu or +4 to what I’d like it to be , so instead of +4 being reference to -20 , could I use -18 as my reference point instead or would this be driving the adc and dac’s over their limit ?

    Reply
    • Hey Josh,

      These principles aren’t nearly as important for DACs as they are for analog modelled plugins and vintage analog hardware.

      You’d have to check your operating manual to find out your DAC’s optimal nominal operating level.

      If all else fails, just use your ears. If you hear distortion, it’s clearly too much output.

      Hope that helps, all the best.

      – Stefan

      Reply
  5. Hello Stefan , yes I meant +4dbu sorry , I’m using an Apollo x16 to sum my mixes out into a dangerous 2bus + . I’ve been recording my levels at -20 average and it does seem low on the meters , but then again , wouldn’t this be the sweet spot of +4dbu ? Thank you .

    Reply
    • Hey Josh,

      Remember, this -18dBFS guideline only applies to analog (and analog modelled plugins).

      Don’t overthink it too much if you aren’t going down this route. If so, use your ears.

      They work better than mathematical figures!

      Thanks for writing, all the best.

      – Stefan

      Reply
  6. So I’m confused if my interface has +24 dbu of headroom , wouldn’t +4db unity gain equal to -20 dbvu ? And wouldn’t your interfaces headroom determine the average level going into the adc and out of the dac ? Thanks for sharing .

    Reply
    • Hey Joshua,

      In your case, your audio interface clips at +24 dBu which is the equivalent of 0 dBFS (unity gain) in the digital.

      Now, I’m not really sure what you’re asking… If you +4 dB above unity again, you’d be at approximately +28 dBu (you’d be clipping).

      If you mean +4 dBu, you’d be at about -20 dBFS.

      You can check THIS article and THIS ONE for reference.

      Thanks, I hope than answers your question!

      – Stefan

      Reply
      • I took your advice and while this works great for some applications , it doesn’t seem to work so great on instruments or notes using higher pitched frequency’s , and trying to get these notes to reach -18 on a vu meter will make you go def , other then that -18 is a great average to shoot for on a lot of applications iso .

        Reply
        • Hey Josh,

          You’re absolutely right about that. That’s why decibels have different weightings to compensate for this (for example, dB(A), dB(U), etc…)

          Low frequencies produce more power, so it’s normal that you’d need to boost a flute much higher to reach that target, for example.

          Like you say, it’s a good average target to strive for. Always use your ears for best results!

          Thanks for your comment, all the best!

          – Stefan

          Reply
  7. Then there’s a third reason (and possibly most important):

    If your preamp levels is pushing a lot more than -18db into your interface’s input (say -12 to -6 db), then you’re pushing your preamps a lot harder than when they were designed for. Studios that tracked to tape to get around 0 db of input had their preamp gain control far below what a lot of novice studios push to get the -6 or -12 db. This means clipping at the preamp level is happening in order to get these high levels into your DAW. Recording at -18 or so ensures you’re not pushing your preamp/compressor’s input/output levels too hard.

    Reply
    • Hey Donn,

      You’re absolutely right! However, that’s not always the case nowadays with digital equipment.

      For example, some audio interfaces now feature “32-bit float” recording which essentially makes it impossible to clip. In theory, the dynamic range becomes infinite.

      It’s only important to remember that not every plugin/device in your signal-chain can achieve this.

      It’s true that most vintage preamps/amplifiers were regulated to -18dB (which is what 0dBVU represents on the meter).

      Either way, if we’re going to pick a standard, why not use the one that’s always been in place? -18dB/0dBVU.

      Thanks for stopping by, it was great to hear from you!

      – Stefan

      Reply
      • I think you might be missing my point. I’m talking about pushing a dedicated mic pre too hard, not the interface. Example: If I dial in the proper levels for tape in my external mic pre (Neve, A-Designs, Avalon etc), it should be about the same as if I’m dialing in my mic pre to give me about -18db on my DAW. That means the input signal on my mic pre is just about right. But when I crank the input up on a mic pre and get it around, say -6 or -12 db on my DAW (assuming the digital interface is at unity gain on the inputs), that means I’m running my external mic pre really hot. With mics like a U-87 that are inherently loud and headroom challenged, that extra 6 to 12 db of signal is too much gain at the preamp level, and usually means distortion or “FET fizz” between the mic and the preamp before it even hits the DAW. Therefore, by “dialing down” my mic preamps so that my DAW is reading about -18db, I’m also preventing overload at the preamp. To put it simply, recording DAW levels at -12 to -3 often means running an external preamp too hot to get to those levels, and is driving the external mic pre too hard. Thus, analog distortion is occurring before the signal even hit the interface. That’s the greatest difference in signal integrity I noticed when I learned to run my levels around -18db by turning down my mic pres.

        Reply
        • Hey Donn,

          I thought you were talking about the preamps on the audio interface so yes, I think I misunderstood you.

          You’re right, the external microphone preamps you mentioned are designed to operate at -18dB. Even analog modelled plugins (based on these preamps) are designed to operate at the same -18dB, but most people don’t realize that it makes a difference (even inside the DAW).

          I didn’t talk much about the hardware in this article because I figured that engineers working with analog were already familiar with the -18dB/0dBVU target.

          Technically speaking, even the analog preamp of an audio interface should have an optimal nominal operating range (although this might not necessarily be -18dB).

          We’re definitely on the same page though.

          Moral of the story… Set your levels at -18dB for recording and you can’t go wrong.

          Thanks for your input, I’m always happy to discuss!

          – Stefan

          Reply
  8. Wow…thank you. You just solved my problem with persistent distortion of vocals and bass on my Facebook live streams even though the faders stayed out of the red zone and the final signal was very low. I forgot how conditioned I had become with analogue tape recording that I didn’t connect the dots when it came to digital live production.

    Reply
    • Hey Rick!

      That’s interesting, so your audio was clipping on Facebook even though it was below 0dB?

      Maybe the platform itself has some sort of “threshold” in regards to amplitude. I’m glad the article helped you find a solution to a problem I wasn’t even aware of!

      In general, setting your levels lower will always be beneficial because you can always increase them later. However, it’s impossible to undo clipping.

      Thanks for stopping by, let me know if you need anything else. Take care!

      – Stefan

      Reply
  9. “Set your track’s fader to unity gain (aka 0 dBFS)”

    This is not correct terminology. Unity gain is “0 dB”, not “0 dBFS”.

    dB is a relative change in level.

    dBFS is an absolute measurement of level.

    If your signal is at -18 dBFS, and you put it through +6 dB gain, it will be at -12 dBFS. “0 dBFS level” and “0 dB gain” are both correct terminology, but there is no such thing as “0 dBFS gain”.

    Reply
    • Hello Guest (that’s an interesting name),

      I sincerely appreciate the correction/lesson. I haven’t updated this post in a while, so I’ll keep this comment as a reminder!

      Admitedly, I focus much more on the music making rather than the terminology. It’s nice of you to go through my entire post just to find a typo, but we’re much more interested in discussing the actual topic of the article here. I’m curious, what did you think about this approach to setting levels?

      I’ll most likely be updating this post in the coming weeks, so I always appreciate the constructive criticism.

      Don’t be shy next time though, you’re more than just a “guest” at Decibel Peak. Thanks for stopping by!

      – Stefan

      Reply

Leave a Comment

Featured Posts

how to record drums on a budget - decibel peak

How To EQ Drums in Logic Pro X

If you’ve ever found yourself wrestling with the complexities of EQing drums, you’re not alone! Crafting a professional and balanced drum sound is a key