

Are you an aspiring sound virtuoso, fueled by an insatiable passion for shaping the auditory landscapes of films and multimedia projects?
If you’ve ever pondered how to harness the formidable might of Pro Tools, the digital audio workstation (DAW) revered by sound design, foley, dialogue editing, and film mixing professionals worldwide, you’ve arrived at the perfect juncture.
Welcome to our all-encompassing guide, where we’re about to embark on an exploration of Pro Tools that will unravel its intricacies. This odyssey promises to furnish you with the knowledge and tools necessary to elevate your audio post-production skills to new heights, be it crafting immersive soundscapes, perfecting dialogue editing, or molding the aural world of film and multimedia.
As we delve into the depths of Pro Tools, you’ll acquire the skills required to transform raw audio into auditory masterpieces.
Whether it’s the subtle art of foley, the precision of dialogue editing, or the symphony of film mixing, Pro Tools will be your steadfast companion in the journey towards sonic excellence.
Now, here’s the thrilling part – the voyage you’re setting upon today carries the potential to transform your passion for sound into something extraordinary. While our primary focus in this guide is to provide you with a foundational understanding of how to Use Pro Tools, we also offer an exclusive online course tailored for beginners, designed to expedite your learning curve and unveil a path towards a fulfilling career in sound design, foley artistry, dialogue editing, and film mixing.
So, if you’re ready to embark on this resonant journey and taking the initial stride toward a world filled with prospects in sound design, foley, dialogue editing, film mixing, and beyond… Take out your notebook and let’s get started!
Table of Contents
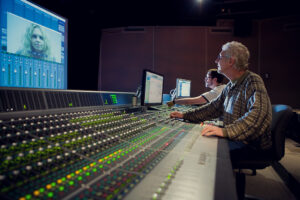
Pro Tools in the Film, TV, and New Media Industry
In the multifaceted world of film, television, and new media, Pro Tools stands as the undisputed champion of digital audio workstations (DAWs).
Its ubiquity in these industries isn’t merely a coincidence; it’s a testament to the software’s unmatched capabilities and the indispensable role it plays in the creation of captivating auditory experiences.
- Industry Standard Practices: Pro Tools has earned its place as the industry standard for several reasons, chief among them being its comprehensive toolset tailored to meet the unique demands of audio post-production in film, TV, and new media. Its precision, reliability, and flexibility have made it the go-to choice for professionals worldwide.
- Sound Design Mastery: Sound design is a cornerstone of cinematic storytelling, and Pro Tools is the craftsman’s toolbox. Whether you’re sculpting the ethereal sounds of an otherworldly landscape or creating the subtle nuances of a character’s inner turmoil, Pro Tools provides an extensive array of plugins, effects, and editing tools to bring your sonic visions to life.
- Dialogue Editing Excellence: Dialogue is the backbone of any film or TV show. Pro Tools simplifies the intricate process of dialogue editing, ensuring crystal-clear and coherent speech. Features like elastic audio and the ability to integrate ADR (Automated Dialogue Replacement) seamlessly make it an indispensable asset for audio professionals.
- Foley Artistry and SFX: Creating immersive worlds often involves capturing the subtleties of everyday sounds and larger-than-life special effects. Pro Tools’ precision editing and synchronization capabilities make it the ideal platform for Foley artists and sound effects specialists to breathe life into visual storytelling.
- Film Mixing Mastery: Film mixing requires the finesse to balance dialogue, music, and sound effects. Pro Tools’ powerful mixing console and automation tools allow for precise control over every audio element. Its compatibility with industry-standard surround sound formats ensures that your mixes are theater-ready.
- Collaboration and Workflow Efficiency: In the fast-paced film and TV industry, collaboration is key. Pro Tools offers collaborative workflows through Avid Cloud Collaboration, enabling multiple professionals to work on the same project simultaneously, regardless of their physical locations. This feature enhances efficiency and streamlines the production process.
- Integration with Video: Pro Tools seamlessly integrates with video, allowing audio professionals to work in sync with visual content. This synchronization is crucial for tasks like ADR, Foley, and sound effects placement, ensuring that the audio aligns perfectly with the on-screen action.
- Scalability and Customization: Pro Tools scales to meet the needs of any production, from independent films to Hollywood blockbusters. Its customizable interface allows professionals to create tailored workspaces that optimize their workflows, making it adaptable to various production requirements.
Pro Tools isn’t just a tool; it’s an integral part of the storytelling process in the film, TV, and new media industries.
Its features and capabilities empower audio professionals to push the boundaries of creativity while adhering to industry-standard practices.
Whether you’re crafting soundscapes, perfecting dialogue, or mixing for the big screen, Pro Tools remains the gold standard, ensuring that every auditory aspect of your production is nothing short of exceptional.
Pro Tools Editing Modes
In the realm of audio post-production, precision and control over your audio clips are paramount. Pro Tools, the digital audio workstation of choice for professionals, offers an array of editing modes designed to cater to your specific needs. Let’s delve into the four primary editing modes in Pro Tools: Shuffle, Spot, Slip, and Grid.
Shuffle Mode
- Purpose: Shuffle mode is your tool for rearranging audio clips with surgical precision. It’s the mode to use when you want to maintain the overall timeline while moving clips around.
- Example: Imagine you’re working on a film and need to rearrange the dialogue between two characters in a scene without affecting the overall duration. By enabling Shuffle mode, you can effortlessly swap their lines, ensuring a seamless flow of conversation.
Spot Mode
- Purpose: Spot mode allows you to precisely place audio clips at specific timecode locations. It’s ideal for synchronizing audio with visual cues in film or ensuring sound effects align perfectly with on-screen actions.
- Example: In a movie scene where a character slams a door, you can use Spot mode to position the corresponding door-slam sound effect to coincide precisely with the visual impact on the screen.
Slip Mode
- Purpose: Slip mode is all about fluidity. It lets you freely adjust the in and out points of audio clips within their original timeline positions, making it perfect for fine-tuning without altering the overall session duration.
- Example: While working on a music project, you may need to tweak the start and end points of a guitar riff to achieve the perfect timing with the rest of the arrangement. Slip mode allows you to do this with ease.
Grid Mode
- Purpose: Grid mode is a must for achieving rhythmic precision in your audio projects. It aligns clips to a grid defined by the session’s tempo, making it ideal for music production or syncing sound effects to a beat.
- Example: Suppose you’re composing a piece of music, and you want to ensure that a specific drum fill aligns perfectly with the song’s tempo. Grid mode helps you snap that fill to the beat, maintaining rhythmic consistency.
Each of these editing modes in Pro Tools caters to specific editing needs, allowing you to work with utmost accuracy and efficiency.
Whether you’re orchestrating the seamless flow of dialogue in a film, synchronizing audio to visuals, fine-tuning audio clips, or ensuring rhythmic precision in your music, Pro Tools’ editing modes empower you to achieve your desired results with ease.
These modes, combined with Pro Tools’ powerful editing tools, put precision and control right at your fingertips, making it the trusted choice for audio professionals across the film, TV, and new media industries.
Audio Routing in Pro Tools
One of the crown jewels in Pro Tools’ arsenal is its unparalleled ability to route and manage audio.
The software provides an extensive array of routing options that empower audio professionals to sculpt, process, and mix audio with precision. In this section, we’ll dive deep into routing audio in Pro Tools, from the basics to industry-standard templates.
Understanding Audio Routing Basics
To harness the full potential of Pro Tools’ audio routing capabilities, it’s essential to grasp the foundational concepts:
- Tracks: In Pro Tools, audio tracks are your canvas. These tracks can be designated as audio, auxiliary, or instrument tracks, each serving distinct roles in the routing process.
- Buses: Buses act as virtual pathways for audio. They allow you to send audio from one track to another, create submixes, and apply processing.
- Inserts and Sends: Inserts and sends enable you to add effects and processors to audio tracks or buses. Sends are often used to route audio to auxiliary tracks for parallel processing.
Routing Audio in Pro Tools
- Create Your Audio Tracks: Begin by creating the necessary audio tracks in your session. These can be for instruments, vocals, dialogue, or any sound source.
- Configure Input and Output: Assign inputs for recording and outputs for playback to each audio track. This defines the source and destination of your audio.
- Set Up Buses: Create buses for specific purposes. For example, you might create an auxiliary bus for reverb or a submix bus for drum processing.
- Routing Audio: To route audio from one track to another, use sends or bus assignments. Sends allow you to control the amount of audio sent, and bus assignments determine where the audio is routed.
- Auxiliary Tracks: Often used for effects processing, auxiliary tracks receive audio from sends or buses. You can then apply effects or further processing on these tracks.
- Parallel Processing: Parallel processing is a common technique in audio production. For instance, you might send a vocal track to an auxiliary track with heavy compression to create a parallel “crushed” vocal effect while preserving the original vocal track.
- Bus Compression: Applying bus compression to a group of instruments or vocals is a popular mixing technique. By routing multiple tracks to a bus and adding a compressor to that bus, you can create a cohesive sound.
Industry-Standard Routing Templates
- Film Post-Production: In film and television post-production, a common routing template involves grouping dialogue, music, and sound effects tracks separately. Dialogue tracks are often routed through a dialogue bus, music through a music bus, and sound effects through an SFX bus. These buses feed into a final mix bus, providing control over each element’s level and processing.
- Music Production: In music production, routing templates can vary widely based on genre and personal preferences. However, a typical setup includes grouping drums, vocals, guitars, and other instruments onto separate buses. These buses can be further routed to subgroups for additional processing.
- Podcast Production: Podcasters benefit from templates that incorporate tracks for hosts, guests, and music or sound effects tracks routed for seamless recording and editing.
- Live Sound Mixing: In live sound reinforcement, routing is essential for managing audio sources and delivering them to the front-of-house and monitor systems. This involves grouping microphones, instruments, and playback sources, then routing them to the appropriate mixes and outputs.
Track Types in Pro Tools
Pro Tools offers a rich palette of track types, each designed to serve a specific purpose in the audio production process.
In this section, we’ll explore some of the core track types and shed light on how they can be employed within the scope of this blog post—audio post-production, sound design, dialogue editing, and film mixing.
Audio Tracks
- Purpose: Audio tracks are the foundation of any Pro Tools project. They’re designed for recording, editing, and processing audio, making them indispensable for tasks like dialogue editing, sound design, and Foley recording.
- Example: In a film post-production scenario, you’d use audio tracks to import and edit dialogue clips, manipulate sound effects, and create ambient soundscapes.
Master Fader Track
- Purpose: The master fader track provides overall control of the session’s output level. It’s essential for ensuring that the final mix adheres to industry-standard loudness levels in film and TV.
- Example: In film mixing, the master fader track is the last point of control, allowing you to adjust the overall mix’s volume to meet delivery standards. This is also where you’ll insert your mastering plugins.
Instrument Tracks
- Purpose: Instrument tracks are tailored for virtual instrument plugins. They’re indispensable for composing music scores or adding virtual instruments to a film or multimedia project.
- Example: When creating a film score, you’d use instrument tracks to host virtual instruments like orchestral libraries or synthesizers to craft the desired musical elements. You can also use instrument tracks for virtual foley instruments.
VCA Master Tracks
- Purpose: VCA tracks act as control groups for multiple audio or instrument tracks, allowing you to adjust their levels collectively. They’re invaluable for maintaining a consistent balance in complex sessions.
- Example: In a film mixing scenario, you might use VCA tracks to group and control the levels of all dialogue tracks, ensuring consistent and natural-sounding conversations.
MIDI Tracks
- Purpose: MIDI tracks are dedicated to hosting and editing MIDI data. They’re indispensable for composing music, controlling virtual instruments, and creating MIDI-based sound effects. The difference between MIDI tracks and instrument tracks is that multiple MIDI tracks can be routed to the same instrument track.
- Example: When working on a film’s musical score, you’d utilize MIDI tracks to compose melodies, trigger orchestral instruments, or create custom sound effects using MIDI controllers.
Basic Folder Tracks
- Purpose: Folder tracks serve as organizational tools, allowing you to group related tracks for a cleaner workspace. They’re beneficial for structuring your session and keeping things tidy.
- Example: In a sound design project, you could use folder tracks to group together various sound effect categories like footsteps, environmental sounds, and dialogue, making it easier to navigate your session.
Routing Folder Tracks
- Purpose: Routing folder tracks are advanced organizational tools that allow you to route audio from multiple tracks to a common bus or auxiliary track, simplifying the routing process.
- Example: In film post-production, routing folder tracks can be used to send audio from multiple dialogue tracks to a dialogue bus for collective processing and control.
Auxiliary Tracks
- Purpose: Auxiliary tracks are used to process audio or instrument tracks collectively. They’re instrumental for applying effects, equalization, or mixing to multiple tracks simultaneously.
- Example: When designing soundscapes for a video game, you’d employ auxiliary tracks to add reverb or delay effects to various sound elements, creating a cohesive and immersive sonic environment.
Pro Tools Keyboard Shortcuts
Basic Shortcuts
- Ctrl (Windows) / Command (Mac) + S: Save
- Ctrl (Windows) / Command (Mac) + Z: Undo
- Ctrl (Windows) / Command (Mac) + Shift + Z: Redo
- Ctrl (Windows) / Command (Mac) + X: Cut
- Ctrl (Windows) / Command (Mac) + C: Copy
- Ctrl (Windows) / Command (Mac) + V: Paste
- Ctrl (Windows) / Command (Mac) + A: Select All
- Spacebar: Start/Stop Playback
- Enter (NumPad) / Return: Return to the Beginning of the Session
Editing Shortcuts
- T: Separate Clip at Playhead
- B: Separate Clip at Selection
- Ctrl (Windows) / Command (Mac) + E: Separate Clip at Edit Selection
- Ctrl (Windows) / Command (Mac) + D: Duplicate
- Ctrl (Windows) / Command (Mac) + U: Strip Silence
- Ctrl (Windows) / Command (Mac) + F: Fade In
- Ctrl (Windows) / Command (Mac) + G: Fade Out
- Ctrl (Windows) / Command (Mac) + M: Merge Clips
- Ctrl (Windows) / Command (Mac) + L: Loop Playback
Navigation and Zooming
- Ctrl (Windows) / Command (Mac) + Left/Right Arrow: Navigate to Previous/Next Marker
- Ctrl (Windows) / Command (Mac) + Up/Down Arrow: Navigate to Previous/Next Edit Point
- Ctrl (Windows) / Command (Mac) + [`] Zoom Toggle (Zoom In/Out)
- Ctrl (Windows) / Command (Mac) + [;]: Zoom to Selection
- Ctrl (Windows) / Command (Mac) + [‘:] Zoom to Fit Selection
Tools
- F1-F8: Select Tools (Selector, Trim, Grabber, Scrubber, Pencil, Zoom, Hand, Smart Tool)
- Ctrl (Windows) / Command (Mac) + Click and Drag: Temporary Tool Selection
Transport Controls
- / (forward slash): Record
- . (period): Stop
- , (comma): Rewind
- . (forward slash): Fast Forward
- Ctrl (Windows) / Command (Mac) + Spacebar: Record-Enable Selected Track
Windows and Views
- Ctrl (Windows) / Command (Mac) + N: New Session
- Ctrl (Windows) / Command (Mac) + O: Open Session
- Ctrl (Windows) / Command (Mac) + I: Import Audio/MIDI
- Ctrl (Windows) / Command (Mac) + = (equal sign): Mix Window
- Ctrl (Windows) / Command (Mac) + – (minus sign): Edit Window
- Ctrl (Windows) / Command (Mac) + \ (backslash): Big Counter Window
- Ctrl (Windows) / Command (Mac) + K: Keyboard Focus (Toggle)
These are just a selection of essential keyboard shortcuts in Pro Tools.
Mastering these shortcuts can significantly enhance your efficiency and productivity when working on audio post-production, sound design, dialogue editing, and film mixing projects.
Pro Tools offers a wide array of shortcuts, and customizing them to your workflow can further optimize your experience with the software.
Surround Sound Mixing in Pro Tools
Pro Tools is a powerful platform for creating immersive audio experiences, and one of its standout features is its support for surround sound mixing.
Whether you’re working on a film, video game, or music project that demands a 5.1 or 7.1 surround sound environment, Pro Tools has you covered.
In this section, we’ll explore how to set up surround sound mixing using the I/O (Input/Output) panel.
Preparing Your Session for Surround Sound Mixing:
Before diving into the I/O panel, it’s crucial to set up your Pro Tools session to work in a surround sound environment. Here are the initial steps:
- Session Setup: Create a new Pro Tools session or open an existing one. Go to the ‘Setup’ menu, select ‘Session,’ and ensure that the ‘Main Output’ format is set to the desired surround sound format, such as 5.1 or 7.1.
- Track Configuration: Configure your audio or instrument tracks to match the surround sound format. For example, in a 5.1 setup, you’ll have six channels: Left, Center, Right, LFE (Low-Frequency Effects), Left Surround, and Right Surround.
- Bus Configuration: Set up buses to route audio to the appropriate outputs. For instance, create buses for the Center, LFE, and Surround channels, and assign them accordingly.
- Routing: Route your audio sources (dialogue, music, sound effects, etc.) to the appropriate tracks and buses according to the surround sound format.
Using the I/O Panel for Surround Sound Mixing:
Now that your session is configured for surround sound, the I/O panel in Pro Tools becomes a crucial tool for managing and routing audio to different speakers in your surround sound setup.
- Accessing the I/O Panel: To open the I/O panel, go to the ‘Window’ menu and select ‘I/O’ (or use the shortcut ‘Ctrl (Windows) / Command (Mac) + I’).
- Assigning Inputs and Outputs: In the I/O panel, you’ll see tabs for ‘Inputs,’ ‘Outputs,’ ‘Busses,’ and ‘Inserts.’ To set up surround sound, focus on the ‘Outputs’ tab. Here, you can configure each output path for your surround sound channels.
- Configuring Surround Outputs: Select an output path (e.g., ‘Out 1-2’) and use the drop-down menu to assign it to the corresponding surround sound channel. For example, assign ‘Out 1-2’ to ‘Left,’ ‘Out 3’ to ‘Center,’ and so on. Make sure the LFE output is configured for low-frequency effects.
- Naming Outputs: It’s helpful to give each output path a clear and descriptive name, such as ‘Left Front,’ ‘Right Rear,’ etc. This naming convention ensures clarity when routing audio in your session.
- Setting Up Sends and Panning: In your audio or instrument tracks, use sends and panning controls to route audio to the various surround sound channels. For instance, if you want to send a track to the ‘Left Surround’ speaker, use the send feature to direct audio to the corresponding bus or output path you configured in the I/O panel.
- Monitor Setup: Make sure your physical monitoring system supports surround sound playback, with speakers placed correctly in accordance with the surround sound format you’ve chosen (e.g., 5.1 or 7.1).
- Mixing and Automation: With your session set up and audio routed through the I/O panel, you can now focus on the creative aspects of surround sound mixing. Use Pro Tools’ mixing tools, automation, and surround sound plugins to craft an immersive audio experience.
By mastering the I/O panel in Pro Tools for surround sound mixing, you can harness the full potential of this powerful DAW for creating captivating and immersive audio in films, video games, music, and multimedia projects.
With precise control over each channel and the ability to route audio to specific speakers, you’ll be well-equipped to deliver audio that envelops and captivates your audience.
Troubleshooting Common Pro Tools Errors: A Guide to Smooth Sailing
Pro Tools is a powerful and versatile digital audio workstation, but like any complex software, it can encounter hiccups from time to time.
When you’re in the midst of a creative session, these issues can be frustrating. Fear not, for this section is your troubleshooting companion, addressing common Pro Tools errors and offering solutions to keep your workflow uninterrupted.
Audio Interface Not Recognized
- Error: Pro Tools may not detect your audio interface, resulting in no audio input or output.
- Solution: First, ensure your audio interface is properly connected and powered on. Check the ‘Setup’ > ‘Playback Engine’ settings in Pro Tools and select your audio interface. If it still doesn’t work, update your audio interface drivers or try reinstalling them.
Pro Tools Crashes on Startup
- Error: Pro Tools may crash during startup, preventing you from accessing your session.
- Solution: Delete or move your Pro Tools preferences file (located in the Pro Tools preferences folder) to reset settings. If this doesn’t work, try uninstalling and reinstalling Pro Tools or updating your operating system.
Buffer Size Errors
- Error: Buffer size errors can lead to audio dropouts, pops, or clicks during playback.
- Solution: Adjust the buffer size in the ‘Setup’ > ‘Playback Engine’ settings. Larger buffer sizes reduce CPU strain but increase latency, while smaller ones do the opposite. Experiment with different buffer sizes until you find the optimal balance for your project.
Session Compatibility Issues
- Error: Trying to open a session created in a different Pro Tools version can result in compatibility issues.
- Solution: Ensure you’re using the same Pro Tools version as the session creator. If necessary, export your session as a Pro Tools interchange file (.ptx) for compatibility across versions.
No Audio Playback
- Error: You may experience issues where Pro Tools isn’t playing back audio.
- Solution: Check your track outputs, the ‘I/O’ settings, and the track’s mute and solo buttons. Verify that the master fader is not muted. Also, confirm that the correct audio interface and output channels are selected in the ‘Playback Engine’ settings.
Pro Tools Freeze or Lag
- Error: Pro Tools may become unresponsive or laggy during operation.
- Solution: Close any unnecessary background applications to free up system resources. Consider increasing your computer’s RAM or optimizing your session by freezing or bouncing tracks to reduce CPU load.
Missing Plug-Ins
- Error: Pro Tools may display missing plug-in alerts when opening a session.
- Solution: Reinstall the missing plug-ins or ensure they are in the correct folder path. Be cautious when updating plug-ins; compatibility issues can arise with new versions.
Disk Allocation Errors
- Error: Pro Tools may show disk allocation errors when recording or saving.
- Solution: Free up disk space on your recording drive, choose a different drive with ample space, or adjust your session settings to use less disk space.
MIDI Sync Issues
- Error: MIDI devices may not sync correctly with Pro Tools, causing timing problems.
- Solution: Double-check your MIDI device settings, including clock source and synchronization settings. Ensure your MIDI interface drivers are up-to-date.
CPU Overload Errors
- Error: CPU overload errors occur when your computer’s CPU can’t handle the processing demands of your session.
- Solution: Increase your buffer size, freeze tracks, or disable unused plug-ins to reduce CPU load. Consider upgrading your computer’s hardware for better performance.
Remember that Pro Tools errors can vary based on your system, hardware, and software setup.
If you encounter persistent issues, consulting Pro Tools forums, reaching out to technical support, or seeking help from experienced Pro Tools users can provide valuable insights and solutions tailored to your specific problem.
Troubleshooting is part of the journey, and mastering it ensures a seamless experience while creating audio masterpieces.
Final Thoughts
In the ever-evolving world of audio post-production, Pro Tools stands tall as the undisputed champion, the trusted ally of sound virtuosos, and the indispensable tool for crafting immersive auditory landscapes in the realms of film, TV, and new media.
From its industry-standard practices to its mastery of sound design, dialogue editing excellence, foley artistry, and film mixing, Pro Tools has cemented its place as the go-to digital audio workstation for professionals worldwide.
As we’ve explored Pro Tools’ editing modes, audio routing capabilities, track types, keyboard shortcuts, and the fascinating world of surround sound mixing, you’ve gained valuable insights into how this powerhouse of a software can serve as your creative canvas, allowing you to shape sound in extraordinary ways.
But the journey doesn’t end here; it’s only just begun.
Your passion for sound can be transformed into something truly extraordinary. That’s why we’re thrilled to offer you an exclusive online course tailored for beginners. This course is designed to expedite your learning curve, providing you with the skills and knowledge you need to embark on a fulfilling career in sound design, foley artistry, dialogue editing, film mixing, and beyond.
Are you ready to take that initial stride towards a world filled with prospects in the audio industry?
Join us on this exhilarating journey and unlock the secrets of Pro Tools to shape the future of sound. Enroll in our online course today and take that transformative leap toward becoming a sound virtuoso.
Sources