In the world of TV and film, shotgun microphones are the industry standard.
If you expect to walk onto a set without a shotgun microphone… THINK AGAIN!!
Of course, I’m mostly speaking to the sound mixers/recordists reading this. If you’re a boom operator though (shogun mic = boom mic), you’ll most likely have one provided to you by the production sound mixer. BUT, it’s always better if you bring your own!
That being said, you’ll definitely want to know HOW to use a shotgun microphone.
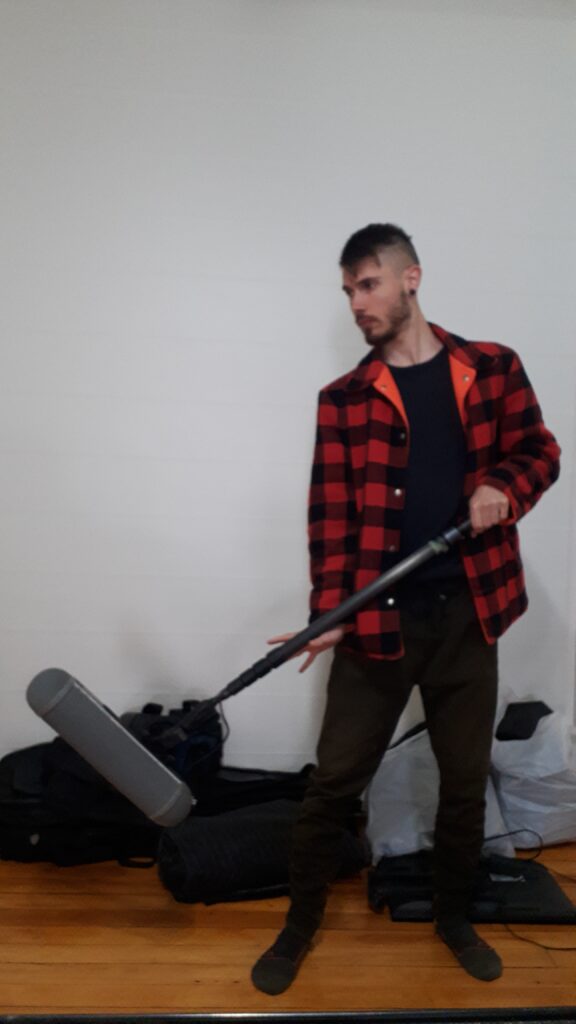
If you haven’t picked up a boom pole yet (why they’re called “boom mics”), now’s a good time!
We’re also going to be looking at other ways to mount your shotgun microphone on set.
Once you’ve read through this guide, you’ll feel much more confident using a shotgun microphone on your next gig (or maybe it’ll be your first).
- Using a Shotgun Microphone with a Boom Pole
- Using a Shotgun Microphone with a C-Stand
- Using a Shotgun Microphone with a Flex Clamp
- Using a Shotgun Microphone with a Camera Mount
- List of Accessories for Shotgun Microphones
- Summary: How To Use a Shotgun Microphone
Using a Shotgun Microphone with a Boom Pole
99% of the time, you’ll be using a shotgun microphone with a boom pole.
That’s why we also refer to shotgun mics as “boom” mics!
However, you’ll definitely want to mount your shotgun microphone on your boom pole using something other than a conventional microphone clip.
Boom operators usually use a combination of…
- Boom Pole
- Shockmount
- Capsule/Blimp/Zepellin
- Windshield/Deadcat
You’ll want to start by acquiring a professional boom pole (not that cheap one from RODE).
K-Tek and Ambient are both big names in the industry. I personally use a K-Tek 102 CCR.

Once you’ve got a boom pole, you’ll want to purchase a kit that includes the rest of the items.
For example, I personally use the Rycote WS4…

Just make sure NOT to cheap out on yourself and get equipment that’ll either break easily or produce mechanical noise (i.e. cable moving inside the boom pole).
I’m giving you a warning here so you don’t get one on set, remember that!
Okay, now we can look at some shotgun microphone techniques with a boom pole…
Boom Mic Technique #1
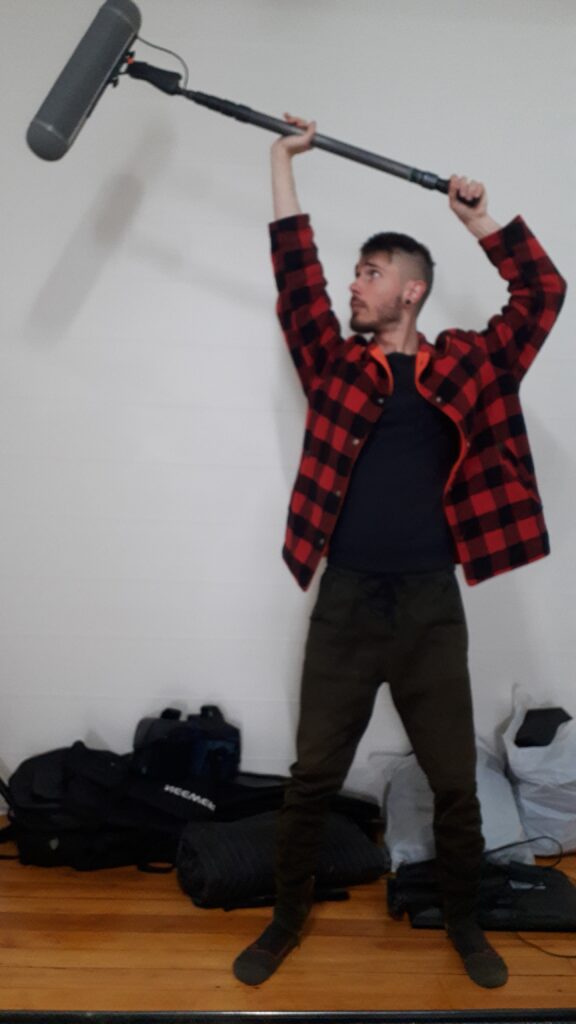
Boom Mic Technique #2
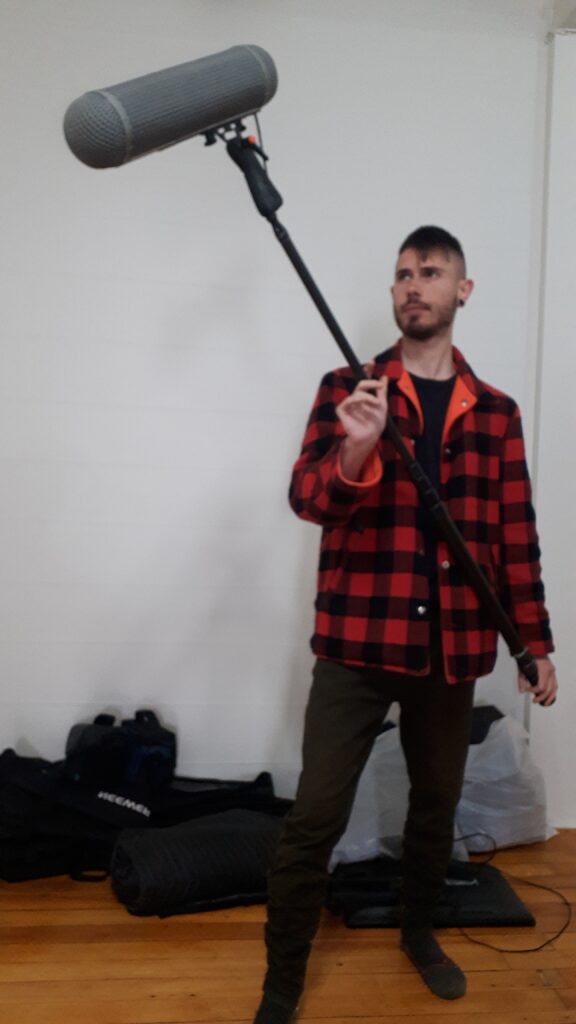
Boom Mic Technique #3
Using a Shotgun Microphone with a C-Stand
To make your job easier at times, you can use a C-Stand with your shotgun microphone.
You can either mount it on the C-Stand itself or use it as a support to rest your boom pole.
Unless you’re recording an interview with one participant though, I recommend using the C-Stand as a support with the help of THIS ATTACHMENT…
It’ll allow you to keep maneuvering your boom pole while saving your arms!
So, if you’re going to be booming for more than 2-3 minutes straight, use a C-Stand…
Using a Shotgun Microphone with a Jaws Flex Clamp
I actually found out about this technique after watching a video by Deity Microphones.
Normally, these types of clamps are used for GoPro cameras, but they actually work great for shotgun microphones (and other mics)!!
I personally use THIS ONE…
I found it most useful for wide-angle shots where you’d either need a MASSIVE boom pole or to rely 100% on your lavalier microphone(s).
It also works great for car scenes, so you won’t need to go in the trunk anymore!
Using a Shotgun Microphone with a Camera Mount
It’s possible that the cameras on set are already equipped with shotgun microphones (cheaper ones), but you might want to consider having a few of those on hand just in case.
You can use them as “scratch mics” or as “backup mics”.
No worries though, it’s usually not expected of the sound mixer/recordist.
Just keep in mind that these shotgun microphones will definitely be connected to the camera(s).
That’s why I recommend getting the ones that are made to be mounted on cameras…

In case you run into a camera with an XLR input, I’d also get an adapter…
Once again, it’s really not that important to have these set up on set, but it can definitely keep your mind at rest knowing you’ll have the lavalier microphone(s), boom microphone(s) and at least one shotgun microphone mounted on a camera.
List of accessories for a Shotgun Microphone
Boom Poles
The first and most important accessory you’ll need to properly use a shotgun microphone on set is a boom pole. I personally use and recommend K-Tek, but I’ve heard great things from Ambient as well!
Here are some boom poles you can check out…
Windshield and Shockmount Systems
You’ll never be able to eliminate handling noise without a proper shockmount system and you’ll never be able to use your shotgun microphone outdoors without a proper windshield system.
Here are some windshield and shockmount systems you can check out…
C-Stands
Eventually, you’ll definitely want to pick up a decent C-Stand for interviews and other scenarios where you’d be booming for long periods of time. Take care of your body!
Here’s the C-Stand I personally recommend…
Boom Pole Mounting Adapters
To get the best of both worlds, you’ll definitely want to pair your C-Stand with a boom pole mounting adapter. It’ll give you the precision of boom and the comfort of a C-Stand.
Here’s the boom pole mounting adapter I personally recommend…
Jaws Flex Clamps
If it seems impossible to get your shotgun microphone close enough, you’ll want to consider mounting it behind an object using a jaws flex clamp.
I personally use this one…
Camera-Mount Shotgun Microphones
Once again, it’s really not essential since most camera operators will usually have one of these on hand. However, having your own camera-mount shotgun microphone can definitely provide more security.
Here are some camera-mount shotgun microphones you can check out…
Summary: How To Use a Shotgun Microphone
It might seem overwhelming at first, but you’ll feel much more confident once you have the right tools!
The most difficult part about using a shotgun microphone is the aim…
Shotgun microphones are VERY directional, so even the slightest off-axis movement will colour the sound (not usually in a pleasant way). That’s why your aim needs to be spot on!
Of course, that takes time and practice. So does holding a boom pole for 12+ hour shoots!
However, you’ll make your job much easier by equipping yourself with some of the accessories we talked about today. It’s completely worth the investment if you want to keep doing this for a while.
If you have any questions, feel free to leave them in the comments.
Here are some other posts you can check out if you want to learn more about shotgun microphones…
Related Articles
- 6+ BEST Shotgun Microphones for Production Sound & Filmmaking
- Sennheiser MKH 416 Review | Production Sound & Filmmaking
Sources
