When I realized that pre-made soundproof booths could cost anywhere from 5,000$ – 25,000$, I knew that I had to find a better way.
The worst part… You’re still not guaranteed that it’ll be 100% soundproofed.
That’s why I decided to take matters into my own hands!
Today, we’re going to learn how to build a soundproof booth at a fraction of the cost using the same high-quality materials. The best part… It’ll be completely customizable and dismantlable.
It’s still close to impossible to get it to be 100% soundproofed, but we’re definitely going to be able to get as close as the pre-made soundproof booths. You’ll see!
- STC Rating Needed for a Professional Recording Studio
- The Best Materials To Build a Cost-Effective Soundproof Booth
- Does a Soundproof Booth Need Ventilation?
- What Kind of Door Is Best for a Soundproof Booth?
- Should You Have Windows on a Soundproof Booth?
- Powering, Lighting and Networking a Soundproof Booth
- Decoupling a Soundproof Booth from the Floor and Walls
- Step-By-Step: Building a Soundproof Booth at Home [Basic]
- Step-By-Step: Building a Soundproof Booth at Home [Advanced]
- Summary: How To Build a Soundproof Booth for a Home Recording Studio
STC Rating Needed for a Professional Recording Studio
To be considered “soundproofed”, we’re going to need to get our soundproof booth to an STC rating of at least 50. Professional recording studios are approximately 50-65 STC.
If this is your first time hearing about STC, it stands for “sound transmission class”.
It’s actually not as difficult as you think to get to 50 STC, but getting to 65 STC becomes exponentially more difficult (and expensive)!
If you really need it though, we’ll be going over some potential upgrades in the “advanced” build.
For now, let’s just go over the STC of some common wall assemblies…
- 2x Single Drywall (wo/ insulation) = 33 STC
- 2x Single Drywall (w/ insulation) = 34-39 STC
- 1x Double Drywall + 1x Single Drywall (w/ insulation) = 39-40 STC
- 2x Double Drywall (w/ insulation) = 43-45 STC
- 1x Double Drywall + 1x Single Drywall + 2x SONOpan (w/ insulation) = 51 STC
- Double Studded Wall (w/ insulation) = 56-59 STC
Now, here are a few facts we can deduct from these wall assemblies…
- Each additional drywall adds about 1-6 STC
- Each layer of insulation adds about 1-6 STC
- Each additional SONOpan adds about 5-6 STC
If 51 STC isn’t enough for you though, you can also use Green Glue on your double layers of drywall to go from an additional 1-6 STC to an additional 10-14 STC.
However, that’ll significantly increase the cost of your soundproof booth.
That’s why I personally recommend the double studded wall.
To get to 56-59 STC, we won’t need any special materials. Instead of spending more money to “improve” our structure, we’re simply going to start off with a superior structure!
The “basic” build will be somewhat of an improvement of the standard double studded wall.
If you want to find out how it’s done, you’ll just have to keep reading!
The Best Materials To Build a Cost-Effective Soundproof Booth
It’s definitely open to discussion, but here are the materials I personally recommend to build a cost-effective soundproof booth…
- Wood Studs (instead of metal studs)
- Regular Drywall (instead of soundproof drywall)
- MDF (instead of plywood)
- Fiberglass Insulation (instead of mineral insulation)
- SONOpan
To better explain why I’ve chosen these materials, I’ll talk about each material and make comparisons with some of the available alternatives for soundproofing.
I’ll even talk about some of the materials that I decided not to include on this list.
Wood Studs vs Metal Studs
Yes, it’s true that metal studs are known to be better for soundproofing.
In fact, metal studs can actually increase the rating of your assembly by 5-9 STC.
However, metal studs are significantly more expensive and much more difficult to work with.
Instead, I recommend using wooden studs and either staggering them or doubling them up (so that each side of the wall is decoupled from the other).
You can actually get MUCH higher ratings this way (up to 59 STC) without anything special.
We’ll be talking more about this type of wall assembly later. It’s the one we’ll be referencing!
Regular Drywall vs Soundproof Drywall
You can actually purchase drywall made specifically for soundproofing.
It’s definitely MUCH more expensive than regular drywall, but it definitely works!
So, why do I recommend regular drywall over soundproof drywall?
If you understand how products like QuietRock work, you’ll be able to get the same results while saving yourself some cash.
Essentially, soundproof drywall is just 2 sheets of regular drywall sandwiched together with a viscoelastic compound in the middle as a dampener.
You could accomplish the same with a product called Green Glue (more on that coming up).
Even then, I’m only going to recommend this technique in the “advanced” build.
If you’ll just be doing the “basic” build, I’d simply use regular sheets of ⅝” drywall. If you’ll be layering drywall together though, I’d go with ½” sheets instead.
Too complicated? As long as you can afford it, pre-made soundproof drywalls are for you!
MDF vs Plywood
You’ll definitely be needing something sturdy for flooring.
You might even be making your own door, so what type of wood is best?
Besides looking nicer, MDF actually has a higher STC rating than plywood and it increases even more depending on the thickness of the piece.
However, MDF and drywall are almost identical when it comes to STC ratings.
It’s the plywood that underperforms…
That being said, I don’t recommend using plywood for your soundproof booth.
SONOpan
Have you heard of SONOpan?
It’s actually quite common in Canada (because it’s a Canadian product), but I’m pretty sure it’s available worldwide.
It has great acoustic properties (it’s very absorbent) and has a higher STC rating than drywall.
We’ll actually be using it in our soundproof booth build instead of internal drywall.
More on that later, but you can also add as many layers of SONOpan as you want. However, it can start to get expensive if you overdo it so I don’t recommend more than 2 per module.
Fiberglass Insulation vs Mineral Insulation
Mineral insulation performs better than fiberglass insulation.
So, why am I recommending fiberglass insulation? Here are a few reasons…
- It costs less (you can double it up and get better results)
- It’s better for not trapping humidity (in warmer climates)
- The difference in STC rating is almost inaudible
We’re essentially going to be creating a “double-wall”, so we’re definitely going to need more insulation than a typical wall assembly.
And remember, insulation doesn’t help that much when it comes to soundproofing.
That’s why I recommend getting more for your money in this case!
Resilient Channels
Resilient channels definitely work, but getting optimal results is difficult.
If you’re staggering your studs or double studding (which is what we’re doing), the walls will already be decoupled so resilient channels will be useless.
If anything, they’ll be most useful on the floor/ceiling modules.
Even then, you’ll need to make sure you’re installing them properly and determine if it’s even worth it.
Green Glue vs Mass-Loaded Vinyl (MLV)
Both of these products are used for the same purpose in soundproofing; dampening.
IF we were to use them, we’d be adding them between 2 layers of drywall. It’d help with dampening the 2 pieces of drywall and filling in any air gaps.
The mass-loaded vinyl would also add some mass to the equation!
Green Glue performs slightly better and is more cost-efficient when purchased in bulk though.
Does a Soundproof Booth Need Ventilation?
It’s not essential, BUT…
You’ll definitely want to consider ventilation if you’re building a larger soundproof booth and plan to work inside of it for long hours.
Here’s what you’ll need to get a HVAC ventilation system installed…
Now, you might be wondering how we’ll get the HVAC installed without ruining our work.
It’ll be covered in the step-by-step instructions, but the first thing you need to do is get yourself a quiet set of fans and potentially a muffler (if the fan is still too loud).
Of course, we’re making a compromise here so don’t expect any miracles.
However, you’ll find that the “ventilation module” will be one of the most soundproof modules of the booth if you get the job done right.
Before getting into that though, let’s talk about doors…
What Kind of Door Is Best for a Soundproof Booth?
Ideally, you’ll want to make doors out of thick MDF for your soundproof booth.
If you can find one second-hand, metal doors (also known as fire doors) can also be an excellent option for soundproofing. MDF is definitely more affordable though.
But, regardless of what you chose, it’s the quality of the seal that’ll affect STC the most.
To achieve an airtight seal on the door frame, it’ll be best to frame the door on all sides (including the bottom, which isn’t usually done on regular doors).
That’ll eliminate the need for a door sweep (which would be useless anyway because part of the soundproof booth isn’t going to be touching the ground).
You’ll also want your door frames to include a “bevel” so that the door can rest on it once it’s completely closed. That alone should create a pretty good seal.
To take it one step further though, we can also improve the seal with either…
- Weather Strips
- Rubber Gaskets
- Cloth
Just remember to get that set up BEFORE installing the doorknob/lock.
If this sounds too complicated, however, you can actually just purchase exterior/front doors and install those. It’ll be more expensive, but they’ll have a great seal right out of the box!
And yes… You’ll ideally want to have 2 doors (one on the inside and one on the outside).
Should You Have Windows on a Soundproof Booth?
The short answer… NO.
I’d personally opt for a security camera instead of using windows on your soundproof booth.
For starters, windows are HORRIBLE for acoustics (they’re extremely reflective). Also, windows are one of the worst materials for soundproofing. Even so-called “soundproof windows” aren’t 100% soundproof (they’re also ridiculously expensive).
BUT, if you absolutely want to add windows… I’m not going to stop you!
TIP: To increase the STC of a window, you can insulate it using window insulation film.
Powering, Lighting and Networking a Soundproof Booth
If you plan to have any type of recording equipment inside your soundproof booth, you’ll definitely need one or more power outlets.
You’ll also definitely need to see inside your soundproof booth!
That being said, it’ll be much easier to install lighting if we’ve got access to power. Instead of mounting lights directly to the booth, you can just place one or more lamps.
What about power though… Is there a way to install an outlet without ruining our work?
The best place to install a power outlet in a soundproof booth is the floor.
I personally recommend one of these types of outlets (or more, if you think you’ll need it).
I’ll be walking you through the process of getting all of that installed in the step-by-step instructions. It’d be the same process for an XLR/TRS patch bay.
Next, we’ll find out how to get your soundproof booth off the floor…
Decoupling a Soundproof Booth from the Floor and Walls
Here’s where we start talking about arguably the most important element of soundproofing…
If you’re a tenant on one of the upper floors, you’ll definitely get complaints if you don’t get your soundproof booth off the ground. It’d defeat the purpose of building one!
Actually, improper decoupling defeats the purpose of a lot of soundproofing techniques.
It’s one of the aspects I considered the most when designing my soundproof booth.
That’s why we’re essentially going to be building a room, inside of a room, inside of a room (yes, you read that right). You’ll understand better in the step-by-step instructions.
For now, we just need to understand how we’ll be decoupling the booth from the floor.
We’re clearly going to be creating “floor modules” and to suspend them, we’ll be using cement blocks placed on rubber mats.
We could even add insulation in the gap for maximum coverage!
Okay, now we’re ready to actually start building our soundproof booth…
Step-By-Step: Building The Soundproof Booth [Inner Structure]
I already mentioned that our soundproof booth would be using the same principle as the double-studded wall.
However, the conventional double studded wall isn’t 100% decoupled.
That’s why we’re actually going to be building a “core” booth with an additional exterior wall. The “core structure” will be decoupled from the floor while the exterior wall will be touching the ground.
Neither of the walls will ever make contact though, so that’ll definitely increase the STC rating.
If it’s difficult to imagine, just follow the steps and you’ll see what I’m talking about…
Step 1 – Set up the foundation

Step 2 – Build “floor/utility modules”
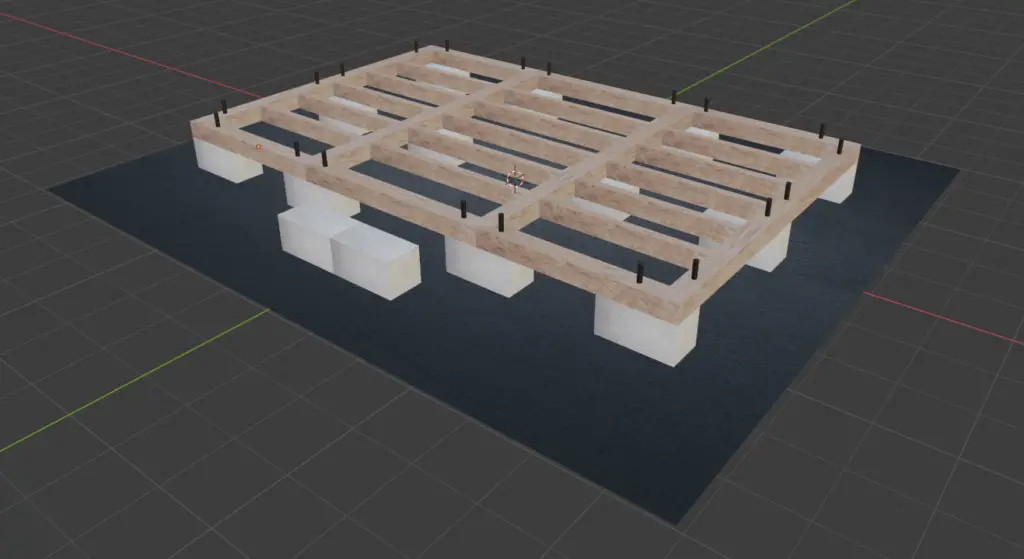
Step 3 – Install power and utilities
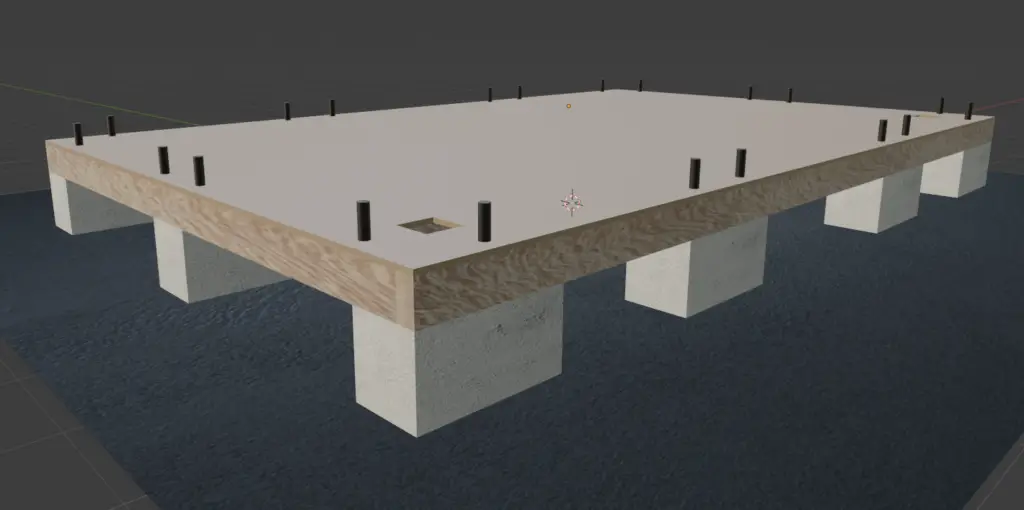
Step 4 – Build “wall/utility and door modules”
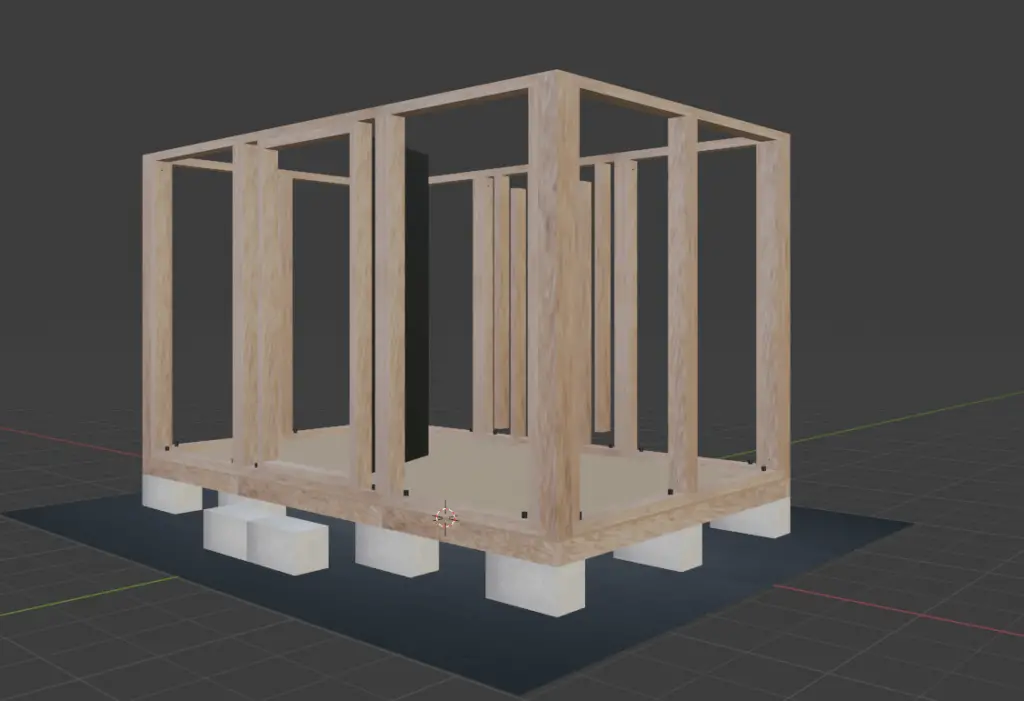
Step 5 – Install the HVAC system
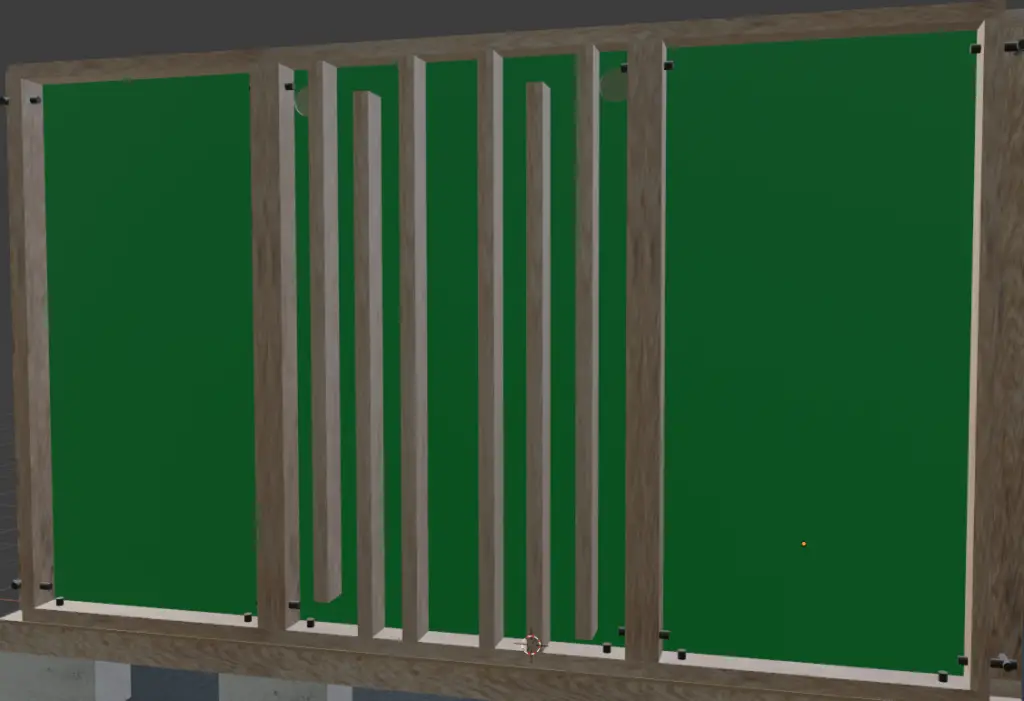
Step 6 – Build “ceiling modules”
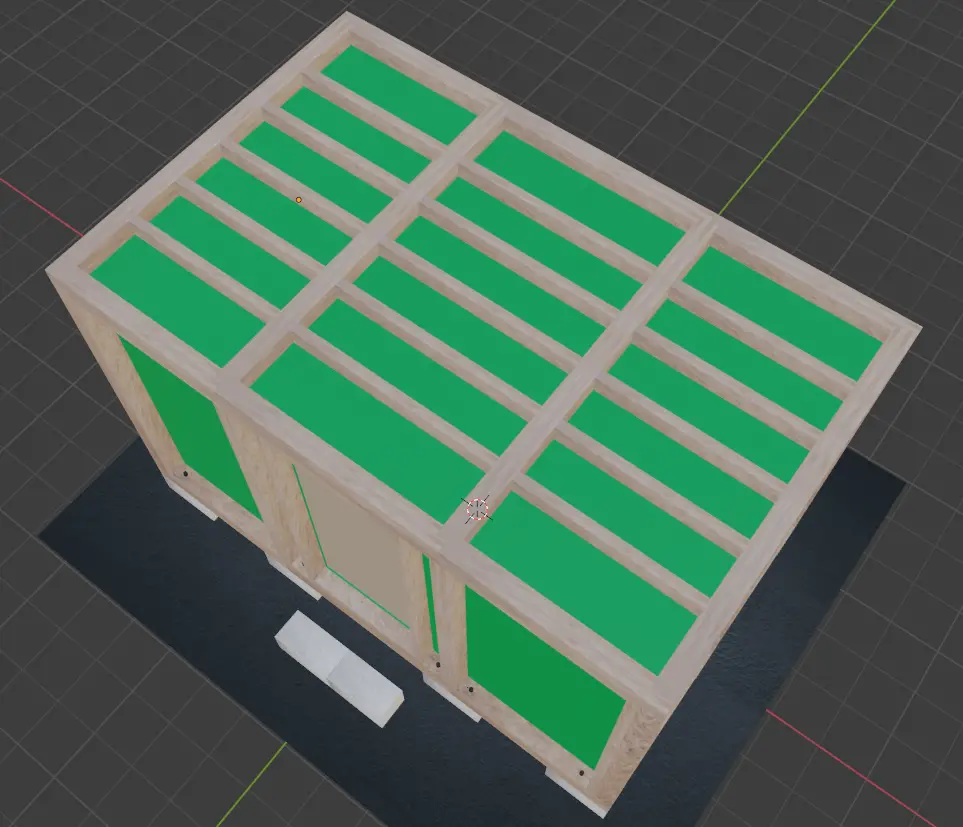
Step-By-Step: Building The Soundproof Booth [Outer Structure]
To be honest, the “basic” build should provide more than enough soundproofing.
However, I’ve decided to walk you through a few potential upgrades if ever you want to take your soundproof booth to the next level!
Step 1 – Build “wall/utility and door modules”
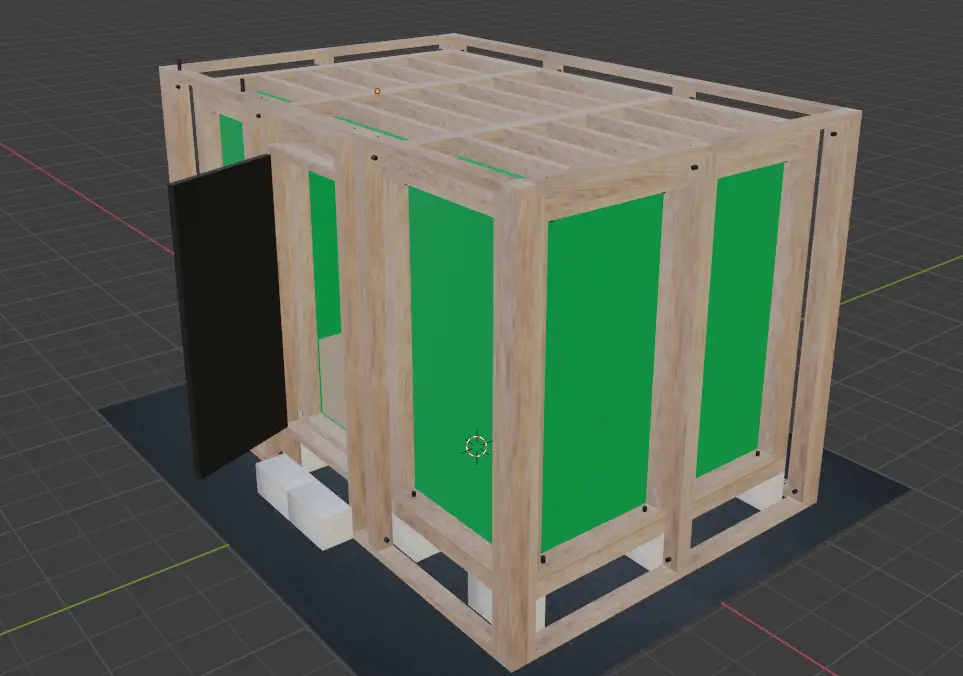
Step 2 – Install the utility panel
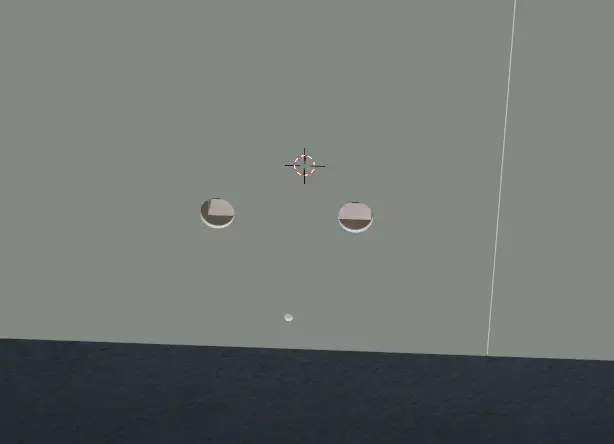
Step 3 – Build “ceiling modules”
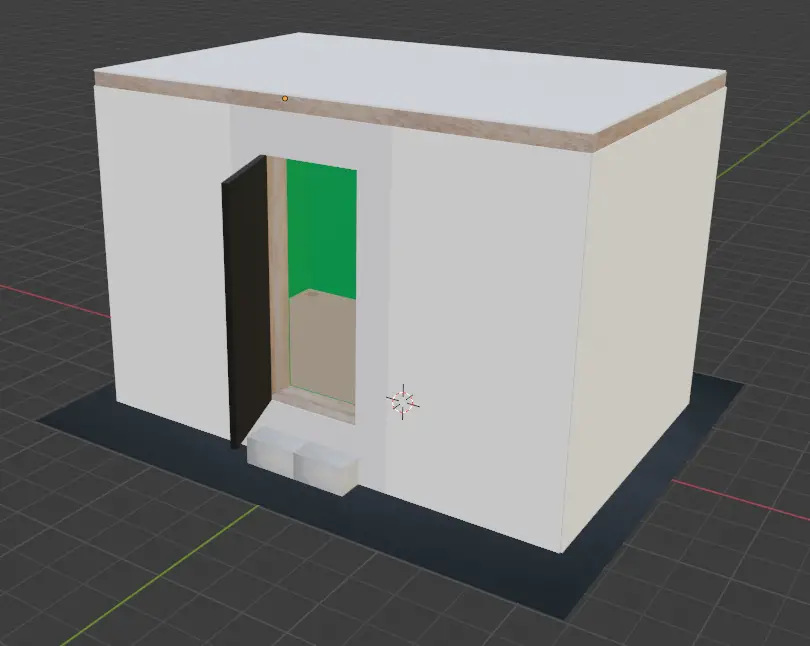
Summary: How To Build a Soundproof Booth for a Home Recording Studio
Now, everyone can have access to a soundproof booth… Regardless of their situation!
I made it my mission to figure this out once and for all and to make as affordable as possible. However, you’ll realize that this soundproof design performs much better than most of the products out there.
Sure, it might require you to get your hands dirty, but it’s completely worth it!
If you don’t think you have the skills to build this soundproof booth, you can always ask someone you know for help. You’ll definitely need at least 2 people to get it installed.
I also highly recommend getting your design approved by your landlord BEFORE buying anything.
I’m actually in the process of creating an online course that’ll go much deeper than this article. You’ll be guided every step of the way and have much more detailed information.
In the meantime, feel free to ask me your questions in the comments.
Thanks for reading, I hope you’re as excited as I am to get started!
Sources
http://www.stcratings.com/assemblies.html
https://sonopan.com/wp-content/uploads/2020/06/SONOpan_architecte_brochure_wall_assemblies.pdf
https://www.greengluecompany.com/noise-soundproofing/interior-noise
https://bettersoundproofing.com/roxul-vs-fiberglass-insulation-for-soundproofing/
https://bettersoundproofing.com/drywall-osb-plywood-mdf-for-soundproofing/
https://bettersoundproofing.com/quietrock-vs-double-drywall/
https://soundproofliving.com/acoustical-window-film/
https://apartmentnotes.com/how-much-weight-can-second-floor-apartment-hold/
https://gearspace.com/board/studio-building-acoustics/171409-any-green-glue-users-care-comment.html
https://www.youtube.com/watch?v=WrAMJpl81Ec
https://www.youtube.com/watch?v=jmgAgFZomd8


