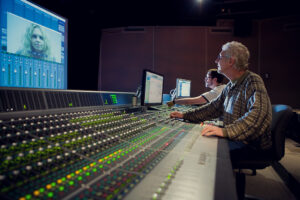


If you’re a home recording studio enthusiast, you understand the importance of having a reliable and powerful computer to handle all of your music production needs. Building a custom PC for music production can be a daunting task, but it’s worth the effort in the long run.
Having second-thoughts? We have a great guide on the best pre-built PCs for a home recording studio.
For the brave, we’ll take a closer look at the process of building a PC for a home recording studio, including the necessary components, peripherals, and specialized hardware.
I’ll even guide you step-by-step on the process of a building your custom PC.
You’ can also use’ll aslo have access to our PC Builder Widget to get an extimate of the cost for your custom PC.
Table of Contents
PC Builder Widget
Use this widget to estimate the cost of building a PC for your home recording studio.
Section 1.1: Choosing the Best PC Hardware for a Home Recording Studio
CPU

When building a PC for a home recording studio, choosing the right CPU is crucial as it is responsible for handling most of the processing work involved in recording, editing, and mixing audio. There are many different CPUs available on the market, but here are some key considerations to keep in mind when selecting one for your home recording studio:
- Cores and Threads: The more cores and threads a CPU has, the better it will be at handling multiple tasks simultaneously. For a home recording studio, we recommend a CPU with at least 6 cores and 12 threads, such as the AMD Ryzen 5 5600X or the AMD Ryzen 7 5800X.
- Clock Speed: The clock speed of a CPU measures how many cycles it can complete in a second. A higher clock speed will generally mean better performance, but it’s important to balance clock speed with other factors like cores and threads. For a home recording studio, a CPU with a clock speed of at least 3.7 GHz is recommended.
- Cache Size: The cache is a type of memory that the CPU uses to store frequently accessed data. A larger cache can improve performance in certain tasks, so it’s worth considering when selecting a CPU. For a home recording studio, a CPU with a cache size of at least 16MB is recommended.
Some other popular CPUs for home recording studios include the Intel Core i9-11900K and the AMD Ryzen 9 5900X. Ultimately, the best CPU for your home recording studio will depend on your specific needs and budget, so be sure to do your research and carefully consider your options before making a purchase.
GPU

When it comes to building a PC for a home recording studio, a dedicated graphics processing unit (GPU) is not always necessary.
This is because most audio recording software and digital audio workstations (DAWs) do not require intense graphics processing power. However, if you plan on doing audio post-production tasks such as video editing, using applications like Adobe Premiere Pro or DaVinci Resolve, then a dedicated GPU can help accelerate the process.
A GPU can help with tasks like rendering video, applying effects, and color grading, which can be resource-intensive and slow down your workflow if your computer doesn’t have enough processing power. Additionally, some DAWs, such as Pro Tools, use GPU acceleration for certain functions, such as displaying MIDI notes in real-time.
When choosing a GPU for a home recording studio PC, you don’t necessarily need to go for the most high-end and expensive option.
A mid-range or budget-friendly GPU can still provide the necessary power for most tasks.
Some popular options for mid-range GPUs include the NVIDIA GTX 1650 Super, the NVIDIA RTX 3060, and the AMD Radeon RX 5700.
Ultimately, whether or not you need a dedicated GPU for your home recording studio PC depends on your specific workflow and the tasks you plan on performing. If you’re only using your computer for audio recording and mixing, you may be able to save money by opting for a CPU with integrated graphics instead.
RAM
 DDR4 DRAM 3200MHz C16 Desktop Memory Kit - Black (CMK16GX4M2B3200C16)")
When building a PC for a home recording studio, the amount of RAM you have is an important factor to consider.
Here are some variables to consider when selecting RAM for your setup:
- Amount of RAM: Generally, the more RAM you have, the better your system will perform. For most home recording setups, 16GB of RAM should be sufficient. However, if you plan to run multiple memory-intensive applications simultaneously, such as recording software and video editing software, you may want to consider 32GB or even 64GB of RAM.
- RAM speed: RAM speed, measured in MHz, can also affect system performance. Faster RAM can provide a slight boost in performance, but the difference may not be noticeable in a home recording setup. Aim for at least 2400 MHz or higher.
- RAM type: There are different types of RAM, including DDR3, DDR4, and DDR5. Make sure your motherboard is compatible with the type of RAM you choose.
- Latency: RAM latency is measured in nanoseconds and refers to the amount of time it takes for the RAM to respond to a request. Lower latency can provide a slight improvement in system performance, but again, the difference may not be noticeable in a home recording setup.
- Dual-channel vs. single-channel: Dual-channel RAM can provide a slight performance boost over single-channel RAM by allowing the CPU to access two memory modules simultaneously. However, the difference may not be noticeable in a home recording setup.
When selecting RAM for your home recording studio PC, it’s important to find a balance between performance and budget. Aim for at least 16GB of RAM with a speed of 2400MHz or higher. If you have room in your budget, consider upgrading to 32GB or 64GB of RAM for more intensive workloads.
Storage (HDD, SSD)

When it comes to building a PC for a home recording studio, the choice between HDD and SSD for storage is crucial.
HDD (Hard Disk Drive) is a traditional storage medium that uses spinning disks to read and write data. On the other hand, SSD (Solid State Drive) uses flash memory to store data and has no moving parts. SSDs are generally faster than HDDs, which can improve the overall performance of your recording software.
Here are some factors to consider when choosing an HDD/SSD for your home recording studio PC:
- Capacity: It’s important to have enough storage capacity to store your operating system, applications, and project files. For a recording studio, it’s recommended to have at least 500 GB of storage space, but 1 TB or more would be better.
- Speed: Both HDD and SSD have their own advantages. HDDs have higher storage capacity and are generally less expensive, but they are slower than SSDs. SSDs are faster and more reliable, but they are more expensive and have lower storage capacity. In a home recording studio, an SSD is recommended for the operating system and applications, as it will improve the overall performance of your computer.
- External Drives: External drives are important for storing sample libraries, backup files, and other large files that take up a lot of storage space. It’s recommended to have at least one external drive with a large capacity (1-2 TB or more) for backup purposes. You can also use an external SSD for storing sample libraries, as it will allow for faster loading times when working on projects.
When choosing an external drive, it’s important to consider the following factors:
- Interface: External drives come in various interfaces such as USB, Thunderbolt, and FireWire. USB 3.0 is the most common and cost-effective option, but Thunderbolt is faster and more expensive.
- Speed: Just like internal drives, the speed of external drives is an important factor to consider. SSDs are faster than HDDs, but they are more expensive.
- Capacity: Make sure to choose an external drive with enough capacity to store your files. As mentioned earlier, 1-2 TB or more is recommended.
When building a PC for a home recording studio, it’s important to consider the capacity and speed of your internal HDD/SSD, as well as the importance of having external drives for backup and storage purposes. Choosing an external drive with a fast interface and enough capacity is also important for a smooth recording and post-production experience.
You can find out more about that in these articles…
Motherboard
 AM4 Zen 3 Ryzen 5000 & 3rd Gen Ryzen ATX Motherboard with PCIe 4.0, Dual M.2, 12+2 with Dr. MOS Power Stage")
The motherboard is the backbone of any computer system and is responsible for connecting and communicating with all the components.
When building a PC for a home recording studio, it is essential to choose a motherboard that provides stability and reliability. Additionally, it’s important to choose a motherboard that is compatible with the rest of the components, including the CPU, GPU, and RAM.
When choosing a motherboard, consider the following specifications:
- Socket: The socket type is the most critical specification to consider, as it determines the type of CPU that can be installed on the motherboard. For example, if you choose an Intel processor, you’ll need to select a motherboard with an LGA 1151 socket or an LGA 1200 socket, depending on the processor generation.
- Chipset: The chipset determines the features and capabilities of the motherboard. For example, the Intel Z390 chipset supports overclocking, while the H310 chipset does not. The chipset also determines the number of USB ports, SATA ports, and PCIe slots available on the motherboard.
- RAM support: The motherboard should support the amount and type of RAM you plan to use. For example, if you plan to use 32GB of DDR4 RAM, you’ll need a motherboard that supports DDR4 and has four RAM slots.
- Expansion slots: Expansion slots, such as PCIe slots, are important if you plan to add additional components, such as a sound card, a Wi-Fi card, or an additional GPU. Make sure the motherboard has enough expansion slots for your needs.
- Audio: When building a PC for a home recording studio, it’s important to have high-quality audio output. Some motherboards have built-in audio, while others require a separate sound card.
Here are some of the best motherboards for building a PC for a home recording studio.
- ASUS Prime X570-Pro: This high-end motherboard is built for power users and professionals. It features the latest AMD X570 chipset, which supports PCIe 4.0 for faster data transfer speeds. It also has a robust VRM design, which allows for stable power delivery to the CPU, making it a great choice for those who need to run multiple processor-intensive applications simultaneously.
- Gigabyte Z590 AORUS Master: This motherboard is designed for the latest Intel processors and features the Intel Z590 chipset. It comes with a robust VRM design and a massive heatsink to keep the motherboard cool even under heavy loads. It also has Thunderbolt 4 support and dual Ethernet ports for fast and reliable connectivity.
- MSI MPG B550 Gaming Edge WiFi: This motherboard is a great choice for those who want to build a high-performance PC for home recording without breaking the bank. It features the AMD B550 chipset, which supports PCIe 4.0 and comes with built-in Wi-Fi and Bluetooth for easy connectivity.
- ASRock X570 Phantom Gaming-ITX/TB3: This mini-ITX motherboard is a great choice for those who want to build a compact yet powerful PC for home recording. It features the AMD X570 chipset and comes with Thunderbolt 3 support, making it ideal for connecting to external storage devices and other peripherals.
When choosing a motherboard for a home recording studio PC, it is important to consider the number of expansion slots and connectivity options available.
You will need enough expansion slots to accommodate your audio interface, graphics card, and other peripherals, and the right connectivity options to ensure fast and reliable data transfer. Additionally, you should consider the form factor of the motherboard, as it will determine the size and shape of your PC case.
Power Supply (PSU)
, RM1000x, 1000 Watt, Gold, Fully Modular Power Supply,Black")
The power supply unit (PSU) is a critical component of a PC build for a home recording studio. It provides power to all of the other components, and it is important to choose a PSU that can deliver clean, stable power to ensure the stability and reliability of the system.
Here are some key factors to consider when choosing the best PSU for your recording studio PC build:
- Wattage: The first consideration when choosing a PSU is the wattage. The power requirements of your build will depend on the components you choose, so it’s important to calculate your power needs carefully. A good rule of thumb is to add up the maximum power requirements of all the components in your system and then add 20% to ensure that you have enough headroom for stability and future upgrades.
- Efficiency: Another important factor to consider is the efficiency of the PSU. Efficiency refers to how much of the power drawn from the wall is actually delivered to the components, with the rest being lost as heat. A more efficient PSU will waste less power as heat, and this can help to keep the system cooler and reduce the overall energy usage of the system.
- Modular vs. Non-Modular: Modular PSUs have detachable cables that allow you to connect only the cables that you need for your build, while non-modular PSUs have fixed cables that can make cable management more difficult. Modular PSUs are generally more expensive than non-modular PSUs, but they can make it easier to build a clean and organized system.
- Brand and Quality: Finally, it’s important to choose a high-quality PSU from a reputable brand. A high-quality PSU will be built with better components and will be more reliable and stable than a low-quality PSU. Look for PSUs from reputable brands such as Corsair, EVGA, and Seasonic.
When choosing the best PSU for your home recording studio PC build, be sure to carefully consider your power needs, efficiency, modular vs. non-modular design, and brand and quality. Investing in a high-quality PSU can help to ensure the stability and reliability of your system, and it’s an important consideration for any serious recording studio setup.
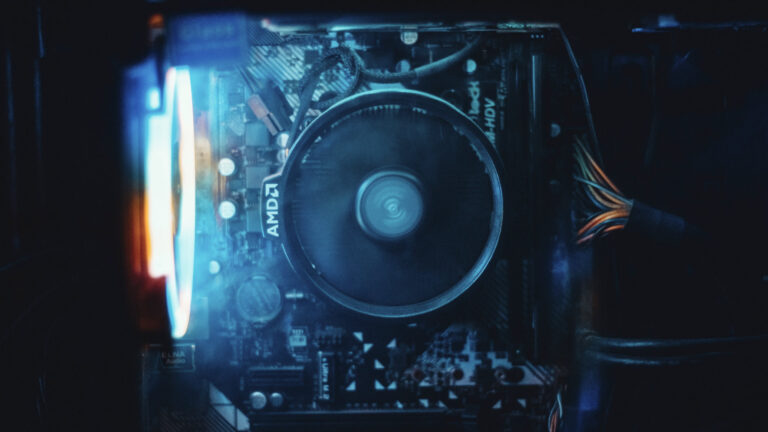
Cooling System

When building a PC for a home recording studio, choosing the right cooling system is essential to ensure optimal performance and prevent damage to components due to overheating. There are several types of cooling systems available, and the best option will depend on the specific needs of your setup…
- Air Cooling: This is the most common type of cooling system and involves the use of fans to circulate air through the case and over the components. Air cooling is affordable, easy to install, and generally sufficient for most home recording studio setups. Look for fans with high airflow and low noise levels, and consider adding additional case fans for better cooling.
- Liquid Cooling: Liquid cooling involves circulating liquid (usually water) through a series of tubes and blocks that are attached to the CPU and GPU. This type of cooling is more effective than air cooling and can result in lower temperatures and quieter operation. However, it is also more expensive, more complicated to install, and requires maintenance to prevent leaks.
- Passive Cooling: Passive cooling involves the use of heat sinks and other passive cooling components to dissipate heat without the use of fans or liquid cooling. This option is best for low-power setups and small form factor cases, but it may not be sufficient for more demanding home recording studio setups.
When choosing a cooling system, it’s important to consider factors such as the size of your case, the power consumption of your components, and the noise level of the cooling system. Look for cooling systems that are compatible with your motherboard and CPU/GPU sockets, and consider purchasing additional case fans or liquid cooling components for more effective cooling.
Additionally, make sure to clean your cooling system regularly to prevent dust buildup and keep your components running smoothly.
The Casing

When building a PC for a home recording studio, selecting the right casing is important to ensure that all the components fit comfortably and are well-ventilated. The casing should also provide enough space for cable management and be sturdy enough to protect the components. Here are some factors to consider when selecting the best casing:
- Size: The size of the casing should be based on the size of the motherboard and the number of components you plan to install. ATX or micro-ATX are popular options for home recording studio builds.
- Airflow: Good airflow is important for keeping the components cool and preventing overheating. Look for cases with multiple fan mounts and consider installing additional fans for better airflow.
- Cable management: A well-managed cable system not only looks neat but also ensures good airflow and makes future maintenance easier. Look for cases with cable routing holes and tie-down points to help you keep everything organized.
- Noise: Recording studios require a quiet environment, and the casing can play a role in noise reduction. Look for cases with noise-dampening foam and sound-proofing features.
- Build quality: A well-built casing will provide better protection for your components and last longer. Look for sturdy materials such as steel or aluminum, and avoid cheap plastic casings.
- Design: While not a critical factor, the design of the casing can be a consideration for some. Some cases come with tempered glass side panels, RGB lighting, or other visual features.
Some of the popular casings for home recording studio builds include the Fractal Design Define R6, NZXT H510, Corsair Obsidian Series 500D, and Phanteks Enthoo Pro. It is important to select a casing that fits your needs and budget while ensuring that it provides adequate space and cooling for your components.
Section 1.2: Peripherals and Specialized Components for a Home Recording Studio
PCIe Sound Card

When it comes to recording and producing music on a PC, having a high-quality sound card is essential. PCIe sound cards, also known as internal sound cards, are a popular choice among home recording enthusiasts due to their improved sound quality and low latency compared to USB or FireWire audio interfaces.
Here are some of the best PCIe sound cards for building a PC for a home recording studio:
- Universal Audio UAD-2 Satellite Thunderbolt – This PCIe sound card is designed to work with Thunderbolt-equipped computers and provides access to a range of UAD Powered Plug-Ins. It offers high-resolution analog-to-digital and digital-to-analog conversion, and has low-latency performance for real-time tracking and mixing.
- RME HDSPe AIO – This PCIe sound card offers up to 24-bit/192kHz resolution, with low-latency ASIO performance for professional-quality recording and mixing. It features a range of connectivity options, including analog and digital inputs and outputs, and MIDI.
- ASUS Xonar AE – This PCIe sound card is an affordable option for home recording studios, offering up to 24-bit/192kHz audio resolution and support for a range of popular audio formats. It features a built-in headphone amplifier and is compatible with a range of operating systems.
- M-Audio Delta 1010LT – This PCIe sound card offers eight analog inputs and outputs, with 24-bit/96kHz audio resolution. It also features S/PDIF digital I/O and MIDI connectivity, making it a versatile option for home recording studios.
These PCIe sound cards offer high-quality audio conversion and low-latency performance, making them ideal for use in home recording studios.
DAC/Amplifier

Digital-to-Analog Converters (DACs) are an essential part of any home recording studio setup. They help convert digital audio signals into high-quality analog audio signals for output through speakers or headphones. When it comes to choosing the best DAC for your home recording studio, there are several factors to consider.
- Audio Quality: The most important factor to consider when choosing a DAC is audio quality. Look for a DAC that offers high-resolution audio playback and a high signal-to-noise ratio (SNR). A higher SNR means that there is less noise in the audio signal and a better overall sound quality.
- Connectivity: Consider the connectivity options of the DAC. Look for a DAC that has multiple inputs and outputs, including USB, optical, and coaxial. This will give you more options for connecting different devices to your home recording studio setup.
- Compatibility: Make sure the DAC you choose is compatible with your computer and software. Many DACs come with proprietary software, which can be useful for adjusting settings and optimizing performance.
- Portability: If you plan to use your DAC on the go or in different locations, consider a portable DAC that is easy to transport.
Some of the best DACs for building a PC for a home recording studio include:
- Schiit Modi 3+: This DAC offers high-resolution audio playback up to 24-bit/192kHz and features USB, optical, and coaxial inputs. It has a simple design and is easy to use.
- Topping D50s: This DAC offers high-resolution audio playback up to 32-bit/768kHz and features USB, optical, and coaxial inputs. It has a sleek design and a high SNR for exceptional sound quality.
- iFi Audio Zen DAC: This DAC offers high-resolution audio playback up to 24-bit/384kHz and features USB, optical, and coaxial inputs. It also has a built-in headphone amplifier for easy headphone monitoring.
- Universal Audio Apollo Solo: This PCIe card features a built-in DSP and offers high-resolution audio playback up to 24-bit/192kHz. It also includes high-quality preamps and the ability to use UAD plugins for further processing.
Ultimately, the best DAC for your home recording studio will depend on your specific needs and preferences. Consider the factors outlined above and do your research to find the DAC that best fits your setup.
Section 2: How To Build a Custom PC (step-by-step)
Step 1: Choose the right components
Before starting the build process, you’ll need to choose the right components for your music production PC. This includes a CPU, GPU (optional), RAM, storage (HDD and SSD), motherboard, and power supply.
Step 2: Prepare your workspace and tools
To ensure a smooth build process, you’ll want to prepare your workspace and tools. This includes a clean and organized workspace, anti-static measures, and the necessary tools such as screwdrivers and pliers.
Step 3: Assemble your PC components
The next step is to assemble your PC components. This includes installing the CPU, CPU cooler, RAM, and motherboard into the case. You’ll also want to install any additional fans or cooling systems to ensure proper airflow and temperature control.
Step 4: Install the power supply
Once the components are installed, you’ll need to install the power supply. This includes connecting the necessary cables to the motherboard, CPU, GPU (if applicable), and storage media.
Step 5: Install the operating system and drivers
Once the hardware is assembled, you’ll need to install your operating system and necessary drivers. This can be done using a USB drive or CD/DVD with your chosen operating system.
Step 6: Install your GPU and storage media
The GPU, or graphics card, is an optional component that can be added to your PC build. It is not essential for music production, but it can be useful if you plan on running intensive visual programs like video editing software or 3D modeling software. If you choose to include a GPU, you’ll need to install it in the appropriate PCIe slot on the motherboard.
Storage media is another important component to consider. For music production, you’ll want a combination of both HDD (hard disk drive) and SSD (solid-state drive) storage. An HDD provides high capacity at a lower cost, while an SSD provides faster access times and improved system performance. You’ll want to install your operating system and music production software on the SSD, while using the HDD for storing your music files and other data.
Step 7: Making connections
The next step is to connect all the necessary cables to your components. Make sure to refer to your motherboard manual to ensure you are connecting everything properly. Some key connections include:
- Power supply cables to the motherboard, GPU, and storage media
- Front panel connectors (power switch, reset switch, power LED, etc.)
- SATA cables to the storage media
- USB and audio connectors to the motherboard
Step 8: Check, check, check
Before closing up the case, it’s a good idea to double-check that everything is properly connected and seated. Make sure that all components are securely fastened and that all cables are properly connected. This is also a good time to tidy up any excess cables to improve airflow and aesthetics.
Step 9: Fire it up
Once you’re confident that everything is properly connected, it’s time to power on your new music production PC. If everything is working properly, you should see the BIOS screen followed by your operating system loading up. Congratulations, you’ve successfully built your own music production PC!
Section 3: Example PC Builds for a Home Recording Studio
Before we dive into the specifics of what you need to build a PC for a home recording studio, it’s worth noting that there are various different PC builds that are suitable for different types of audio work. Here are a few examples:
Starter Audio Workstation Build ($500)
This build is suitable for those who are just starting out in audio production and are on a tight budget. Here are the specs:
- CPU: AMD Ryzen 3 3200G
- Graphics: Integrated Radeon Vega 8
- RAM: 8GB DDR4-3200
- Storage: 240GB SSD
- Motherboard: ASRock B450M-HDV R4.0
- Power Supply: 450W Bronze PSU
Home Professional Audio Workstation Build ($1500)
This build is suitable for those who are serious about audio production and want a PC that can handle more demanding workloads. Here are the specs:
- CPU: AMD Ryzen 7 3700X
- Graphics: NVIDIA GeForce GTX 1660 Super
- RAM: 16GB DDR4-3600
- Storage: 500GB NVMe SSD + 2TB HDD
- Motherboard: ASUS PRIME B550M-A/CSM
- Power Supply: 550W Gold PSU
Productivity Monster Audio Workstation Build ($2500)
This build is for those who want the absolute best of the best when it comes to audio production. Here are the specs:
- CPU: AMD Ryzen 9 5900X
- Graphics: NVIDIA GeForce RTX 3070
- RAM: 32GB DDR4-3600
- Storage: 1TB NVMe SSD + 4TB HDD
- Motherboard: ASUS TUF GAMING B550-PLUS (WI-FI)
- Power Supply: 850W Platinum PSU
Frequently Asked Questions (FAQ)
Q: Can I use a laptop instead of building a PC for a home recording studio?
A: While laptops are portable and convenient, they typically don’t have the same level of customization and upgradability as a desktop PC. Additionally, laptops may have limitations in terms of processing power, storage, and connectivity. If you plan on doing extensive music production and audio editing, a desktop PC may be a better option.
Q: Do I need a dedicated sound card for music production?
A: It depends on the quality of the built-in sound card on your motherboard. If you’re using a lower-end motherboard or plan on recording with professional-grade microphones, you may want to invest in a dedicated sound card for improved audio quality and reduced latency.
Q: How much RAM do I need for music production?
A: It depends on the complexity of your projects and the software you’re using. As a general rule of thumb, 8GB of RAM is a good starting point, but 16GB or even 32GB may be necessary for larger projects and more demanding software.
Q: Do I need a separate graphics card for music production?
A: In most cases, a dedicated graphics card is not necessary for music production. The integrated graphics on modern CPUs are typically sufficient for audio editing and production. However, if you plan on doing video editing or using graphic-intensive software, a dedicated graphics card may be beneficial.
Q: How important is the power supply in a music production PC?
A: The power supply is a crucial component in any PC build, including a music production PC. A high-quality power supply ensures stable and reliable power delivery to all components, reducing the risk of hardware failures and data loss.
Q: Do I need a CPU cooler for my music production PC?
A: Yes, a CPU cooler is necessary to prevent overheating and ensure optimal performance of your CPU. You can choose between air or liquid coolers depending on your budget and cooling needs.
Q: How can I reduce the noise level of my music production PC?
A: There are several ways to reduce the noise level of your PC, including using quiet fans, choosing a case with noise-reducing features, and opting for liquid cooling instead of air cooling. Additionally, you can use acoustic foam or soundproofing materials to dampen any noise that does escape the case.
Summary: How To Build a PC for a Home Recording Studio
In summary, when building a PC for music production and audio editing, you need to carefully consider the different components and peripherals that will meet your requirements and budget. With the right combination of components, you can build a PC that will provide smooth performance and high-quality audio output.
Is building a custom PC the best option for a professional home recording studio though?
Although you’ll avoid lots of the difficulties by following the recommendations in this guide, I personally believe that PC isn’t the way to go.
You’ll actually save yourself valuable time and money with a Mac for your home recording studio.
What do you think though? Custom PC, pre-built PC or Mac?
Let us know in the comments and feel free to ask your questions there as well!